8. Quick Start for Renesas RA
8.1. Supported Environments
Operating System |
Windows: Windows 10 / Windows 11 Linux: Ubuntu 22.04 / Ubuntu 24.04 macOS: macOS 14 Sonoma (Apple silicon) / macOS 15 Sequoia (Apple silicon) |
VS Code version |
1.102.0 (minimum) |
VS Code can be downloaded and installed from this page https://code.visualstudio.com/.
8.2. Installation
Please choose your operating system for operating system dependent installation steps.
Renesas Platform, provides a complete installation wizard to start developing for Renesas RA Family. To set up your environment:
Open VS Code.
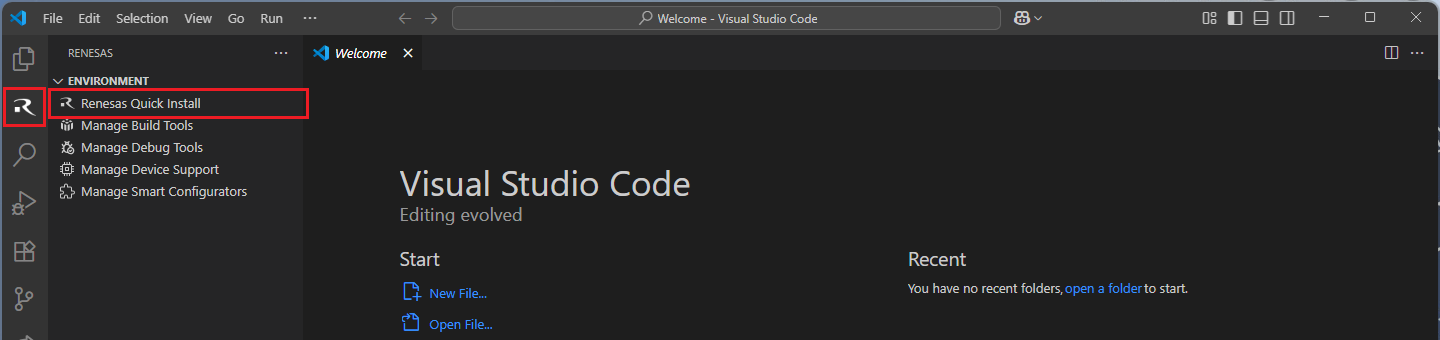
Navigate to the “Renesas” tab in VS Code. Then, click “Renesas Quick Install” in the “Environment” view.
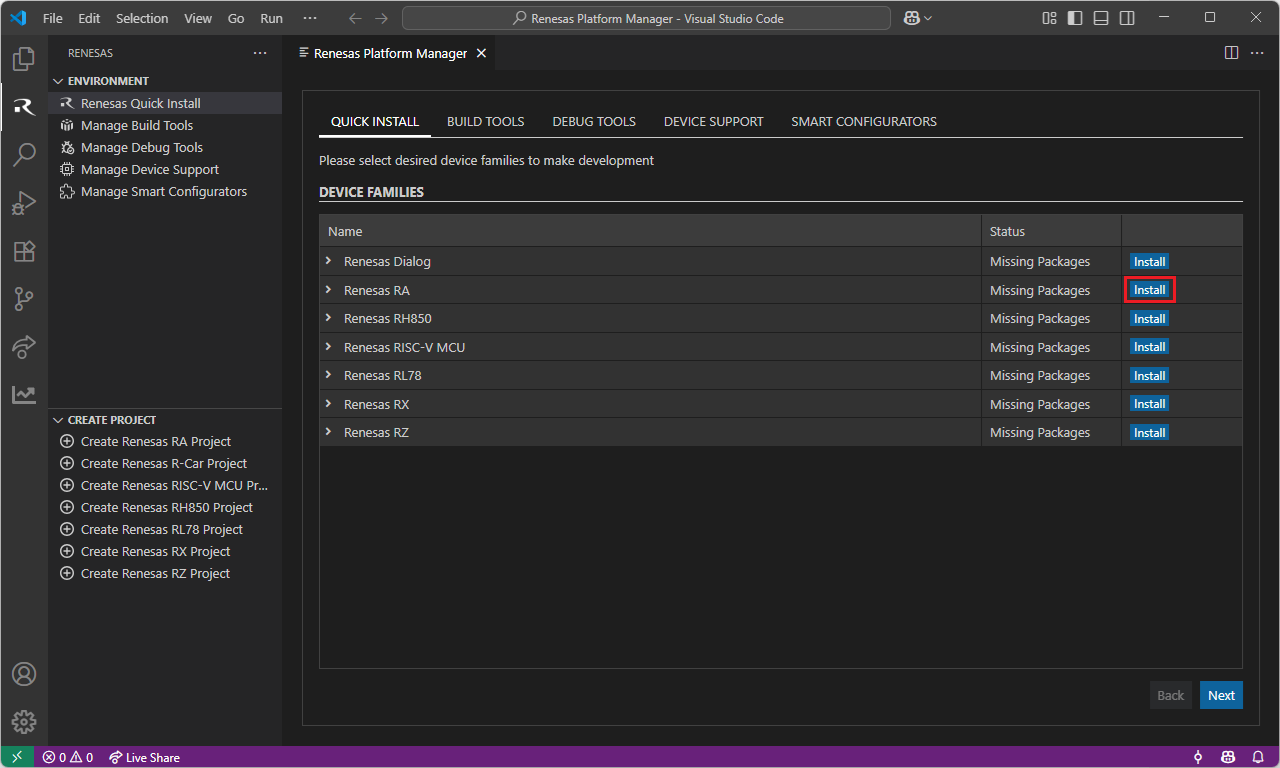
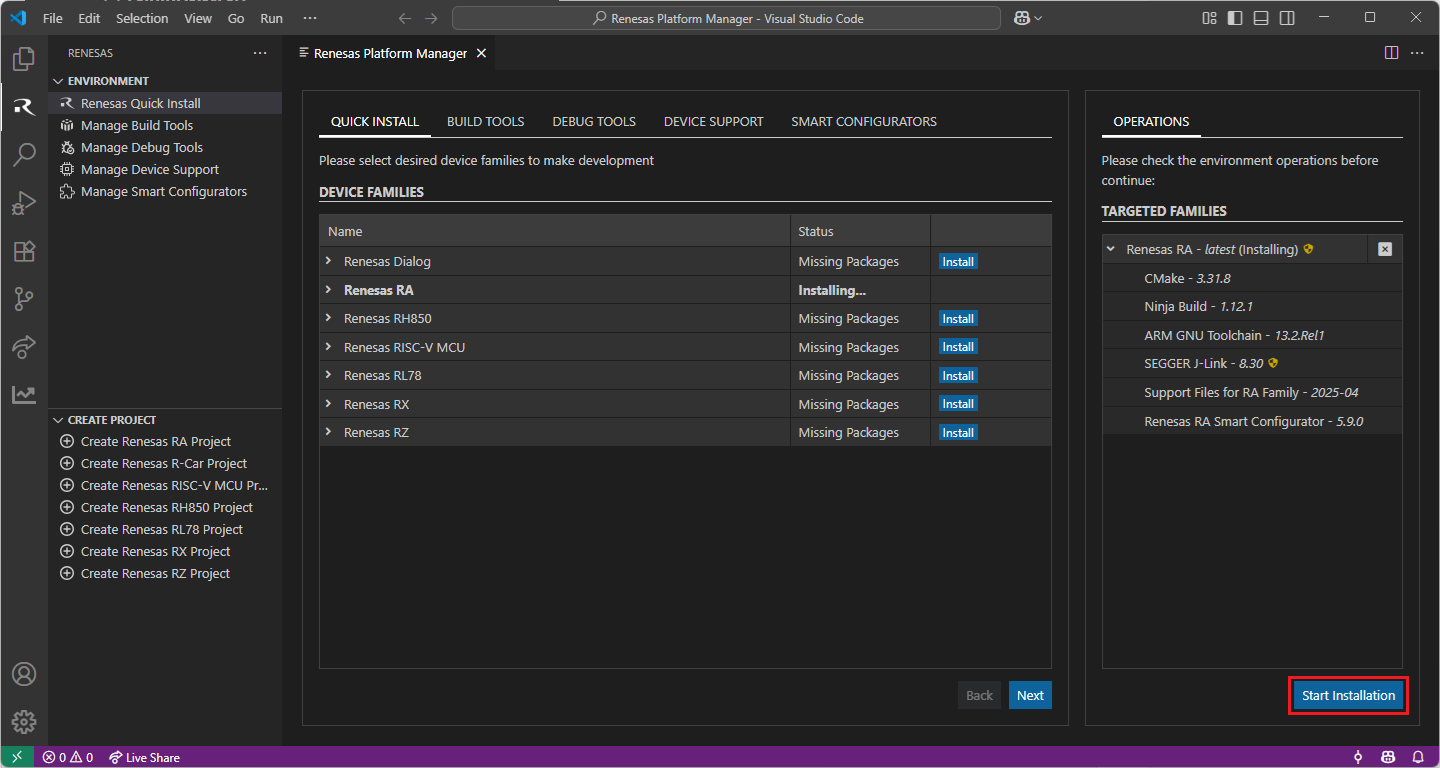
Click the “Install” button for the “Renesas RA” device family. The Renesas Platform will now check the dependencies required by the Renesas RA Device Family. The Renesas Platform extension will check the local environment and CMake, Ninja Build, Python 3.10, ARM GNU Toolchain, SEGGER J-Link, Support Files for RA Family and the Renesas RA Smart Configurator installations, then create an installation plan for them if necessary.
The installation plan automatically includes all the prerequisites. Moreover, you can also select additional tools or toolchain versions by checking the “Build Tools”, “Debug Tools”, “Device Support” and the “Smart Configurators” tabs.
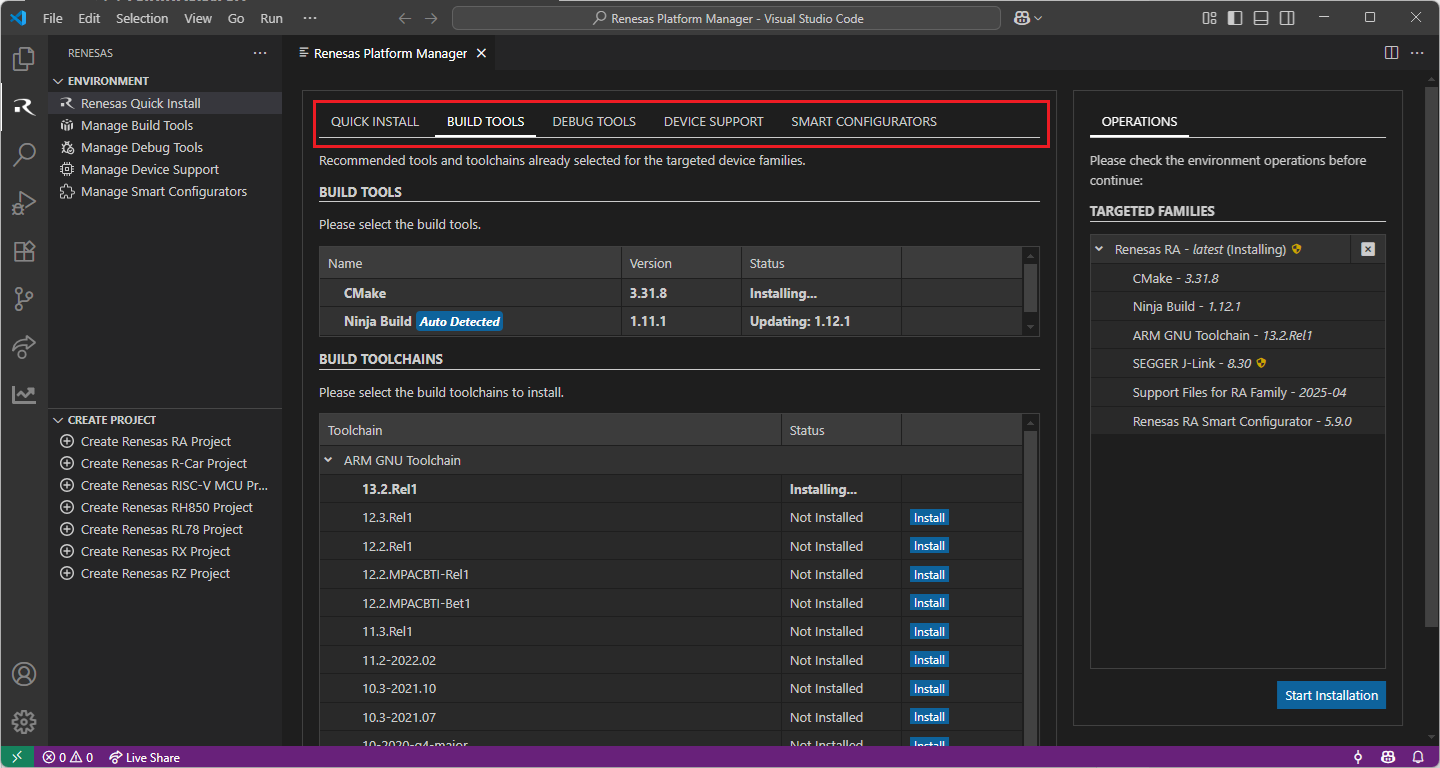
When your selection is ready, click the “Start Installations” button. The download and installation process will start automatically.
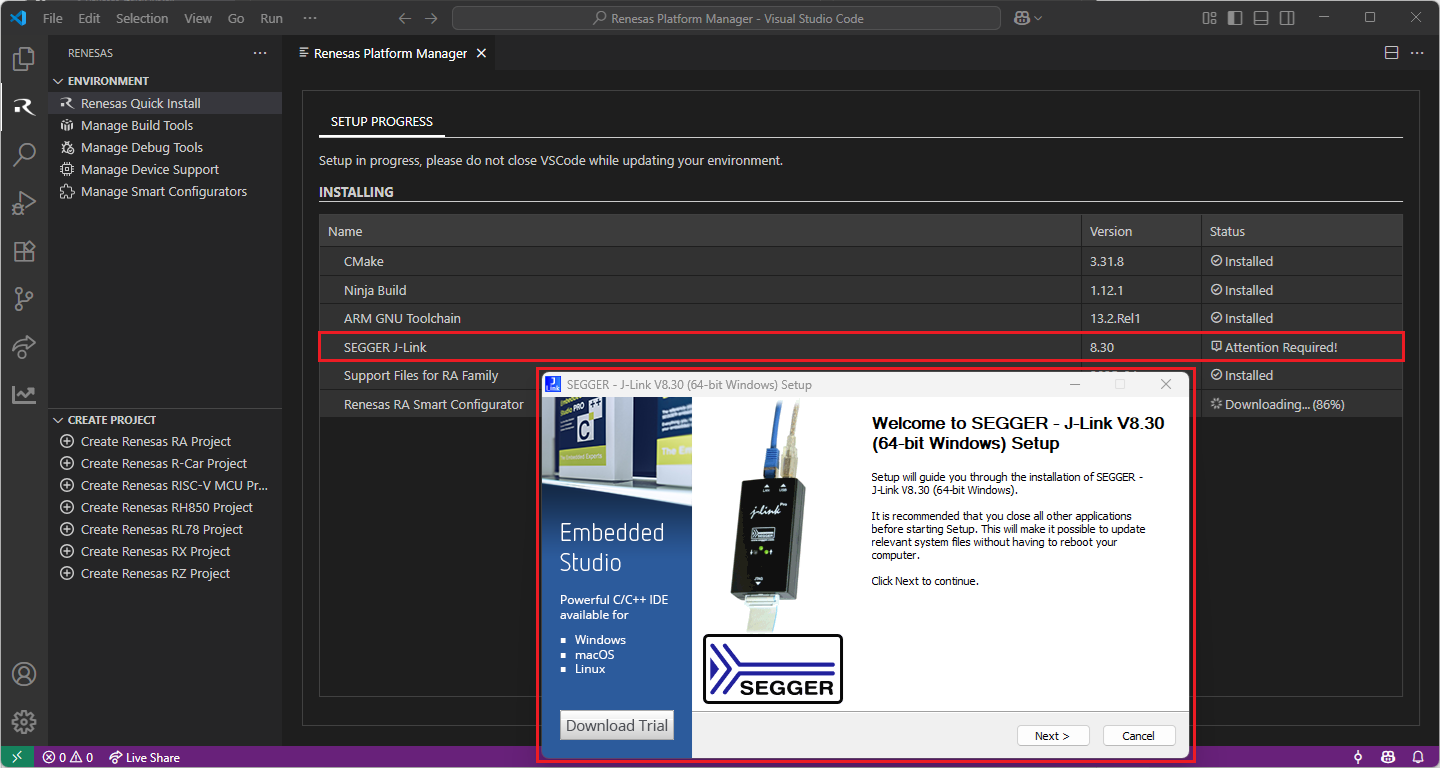
Most of the installations will be performed automatically, some installations may require manual interaction.
During the SEGGER J-Link installation, the setup wizard will appear for manual installation, please follow the steps to complete the SEGGER J-Link installation.
Installing Additional Emulator Drivers
For some debug emulators, you may need to download and install additional USB drivers for establishing a connection with the emulators and devices.
Using Renesas E2/E2Lite Emulators:
If you are using Renesas Emulators, please install the latest drivers before starting your debug session. Use the following links to download the drivers suitable for your operating system and device:
Renesas Platform, provides a complete installation wizard to start developing for Renesas RA Family. To set up your environment:
Open VS Code.
Navigate to the “Renesas” tab in VS Code. Then, click “Renesas Quick Install” in the “Environment” view.
Click the “Install” button for the “Renesas RA” device family. The Renesas Platform will now check the dependencies required by the Renesas RA Device Family. The Renesas Platform extension will check the local environment and CMake, Ninja Build, Python 3.10, ARM GNU Toolchain, SEGGER J-Link, Support Files for RA Family and the Renesas RA Smart Configurator installations, then create an installation plan for them if necessary.
The installation plan automatically includes all the prerequisites. Moreover, you can also select additional tools or toolchain versions by checking the “Build Tools”, “Debug Tools”, “Device Support” and the “Smart Configurators” tabs.
When your selection is ready, click the “Start Installations” button. The download and installation process will start automatically.
Most of the installations will be performed automatically, some installations may require manual interaction.
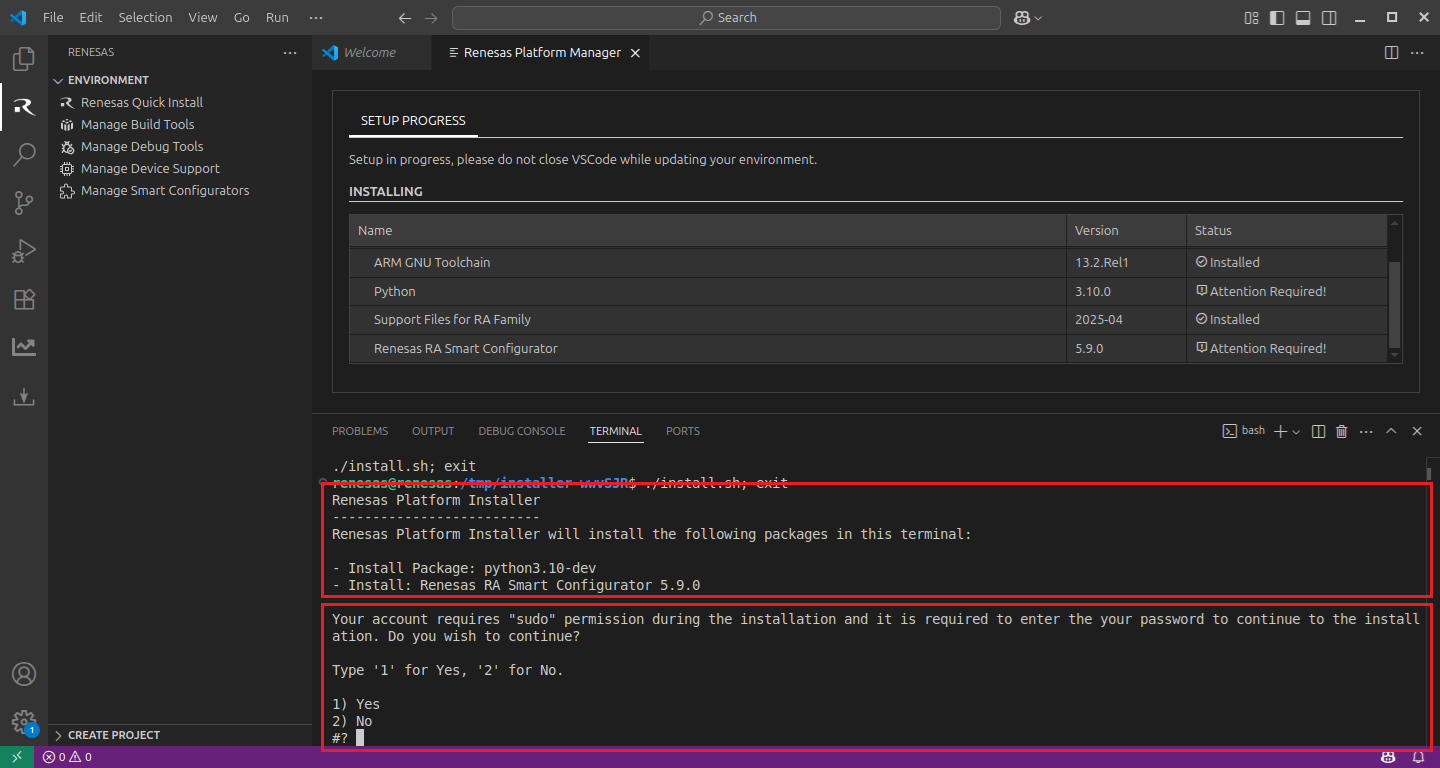
During the “Python 3.10” and the “Renesas RA Smart Configurator” installations, the terminal wizard will appear for manual interaction. The terminal will show the execution plan and ask for confirmation before continuing. During the installation, it may require administrative rights to execute the installation, thus a password could be needed during the installation. Please make sure that the current user has “sudo” permissions and enter the password.
Installing Additional Emulator Drivers
For some debug emulators, you may need to download and install additional USB drivers for establishing a connection with the emulators and devices.
Using Renesas E2/E2Lite Emulators:
If you are using Renesas Emulators, please install the latest drivers before starting your debug session. Use the following links to download the drivers suitable for your operating system and device:
Renesas Platform, provides a complete installation wizard to start developing for Renesas RA Family. To set up your environment:
Open VS Code.
Navigate to the “Renesas” tab in VS Code. Then, click “Renesas Quick Install” in the “Environment” view.
Click the “Install” button for the “Renesas RA” device family. The Renesas Platform will now check the dependencies required by the Renesas RA Device Family. The Renesas Platform extension will check the local environment and CMake, Ninja Build, Python 3.10, ARM GNU Toolchain, SEGGER J-Link, Support Files for RA Family and the Renesas RA Smart Configurator installations, then create an installation plan for them if necessary.
The installation plan automatically includes all the prerequisites. Moreover, you can also select additional tools or toolchain versions by checking the “Build Tools”, “Debug Tools”, “Device Support” and the “Smart Configurators” tabs.
When your selection is ready, click the “Start Installations” button. The download and installation process will start automatically.
Most of the installations will be performed automatically, some installations may require manual interaction.
During the “Python 3.10” and the “Renesas RA Smart Configurator” installations, the terminal wizard will appear for manual interaction. The terminal will show the execution plan and ask for confirmation before continuing. During the installation, it may require administrative rights to execute the installation, thus a password could be needed during the installation. Please make sure that the current user has “sudo” permissions and enter the password.
Installing Additional Emulator Drivers
For some debug emulators, you may need to download and install additional USB drivers for establishing a connection with the emulators and devices.
Using Renesas E2/E2Lite Emulators:
If you are using Renesas Emulators, please install the latest drivers before starting your debug session. Use the following links to download the drivers suitable for your operating system and device:
To utilise the Renesas extensions on macOS, it’s necessary to install:
Homebrew
XZ Archive Utilities
First, install Homebrew (brew), which is an open-source software package management system that manages the installation of software for macOS. For installation and more information about Homebrew, please refer to https://brew.sh/.
After installing the Homebrew, install the “XZ Archive Utilities” by using brew install xz command.
$ brew install xz
Renesas Platform, provides a complete installation wizard to start developing for Renesas RA Family. To set up your environment:
Open VS Code.
Navigate to the “Renesas” tab in VS Code. Then, click “Renesas Quick Install” in the “Environment” view.
Click the “Install” button for the “Renesas RA” device family. The Renesas Platform will now check the dependencies required by the Renesas RA Device Family. The Renesas Platform extension will check the local environment and CMake, Ninja Build, Python 3.10, ARM GNU Toolchain, SEGGER J-Link, Support Files for RA Family and the Renesas RA Smart Configurator installations, then create an installation plan for them if necessary.
The installation plan automatically includes all the prerequisites. Moreover, you can also select additional tools or toolchain versions by checking the “Build Tools”, “Debug Tools”, “Device Support” and the “Smart Configurators” tabs.
When your selection is ready, click the “Start Installations” button. The download and installation process will start automatically.
Most of the installations will be performed automatically, some installations may require manual interaction.
During the “Python 3.10” and the “Renesas RA Smart Configurator” installations, the terminal wizard will appear for manual interaction. The terminal will show the execution plan and ask for confirmation before continuing. During the installation, it may require administrative rights to execute the installation, thus a password could be needed during the installation. Please make sure that the current user has “sudo” permissions and enter the password.
8.3. Creating a Project
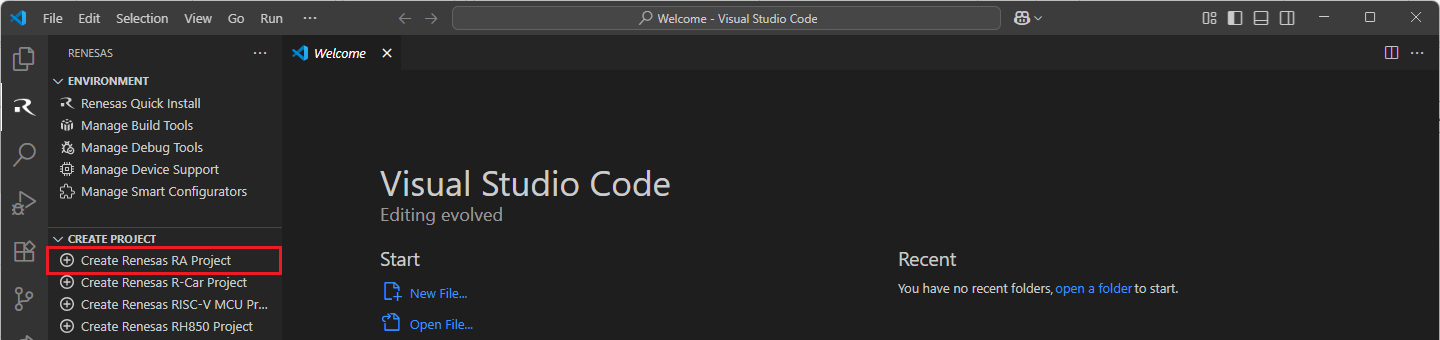
For RA device family projects, it is recommended to use RA Smart Configurator to create a project for VS Code. Smart Configurator can be accessed via the “Create Project” view in the “Renesas” tab. Please use the following instructions to create and build a project for RA device family.
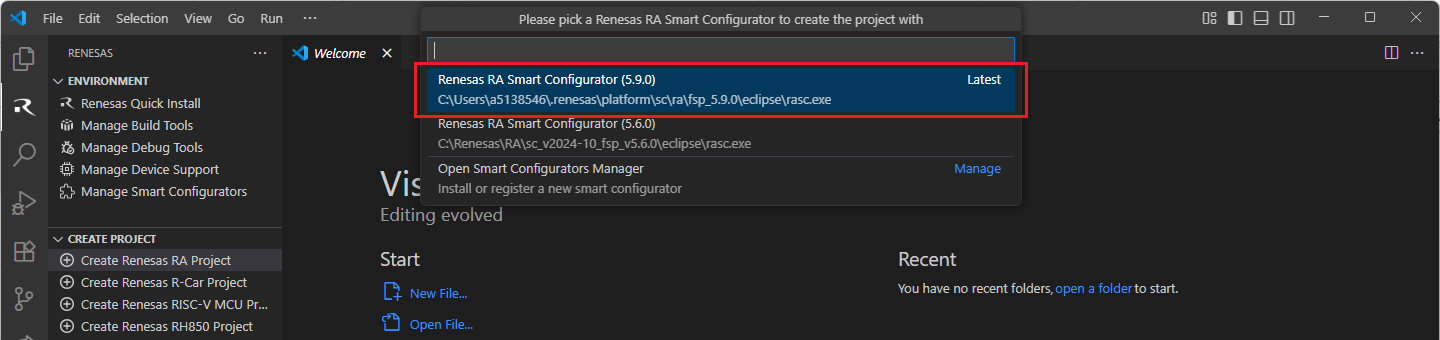
Navigate to “Renesas” and click [Create Renesas RA project] from the commands.
VSCode will show installed [RA Smart Configurator] list, select a [Smart Configurator] from the list.
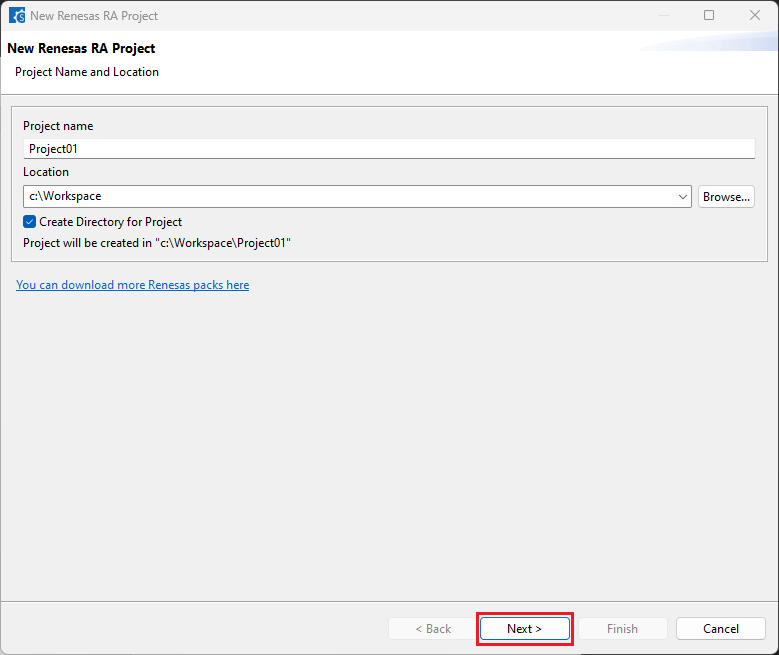
Select a [Folder] to create the project.

Keep the [Project name] and click [Next].
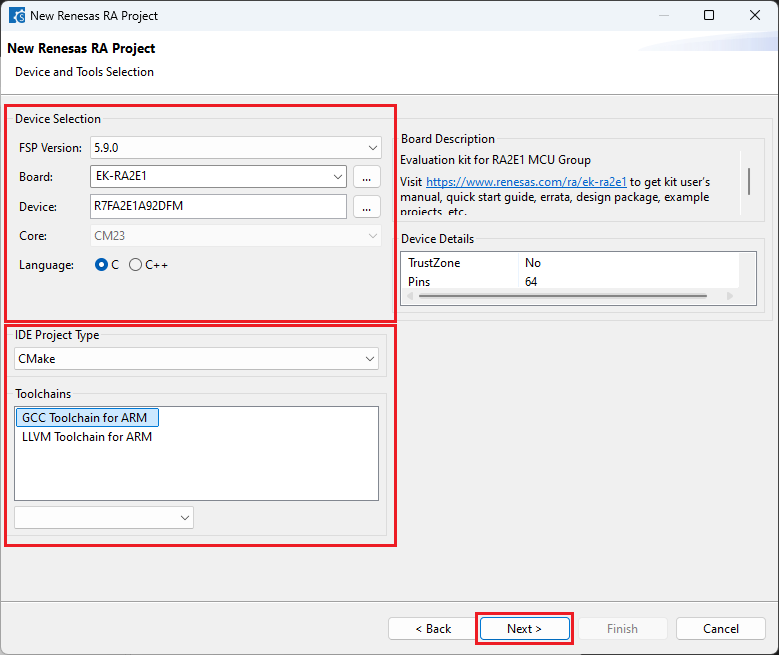
Configure your board, device type and preferred toolchain from the toolchains list, then click [Next].
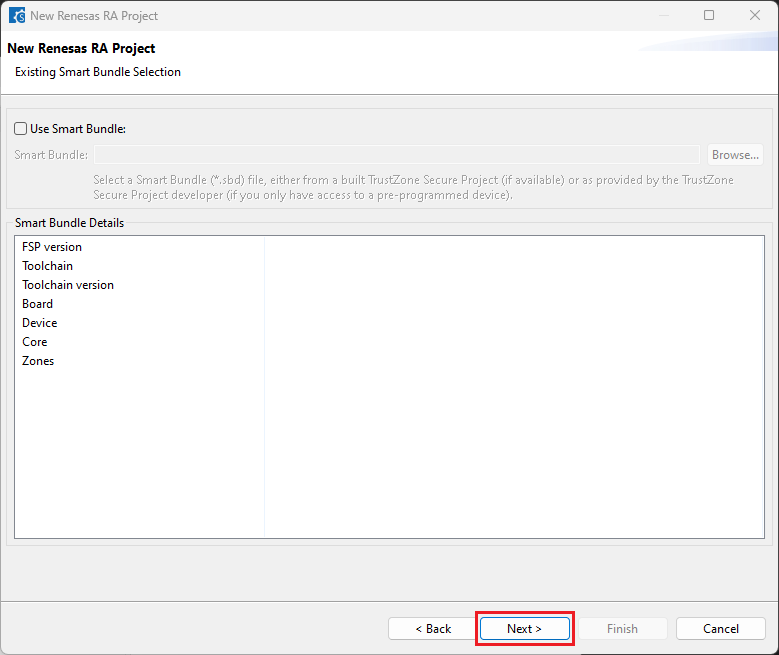
Choose the “Smart Bundle” configuration and continue by clicking [Next] (Skip choosing the Smart Bundle selection for the sample project).
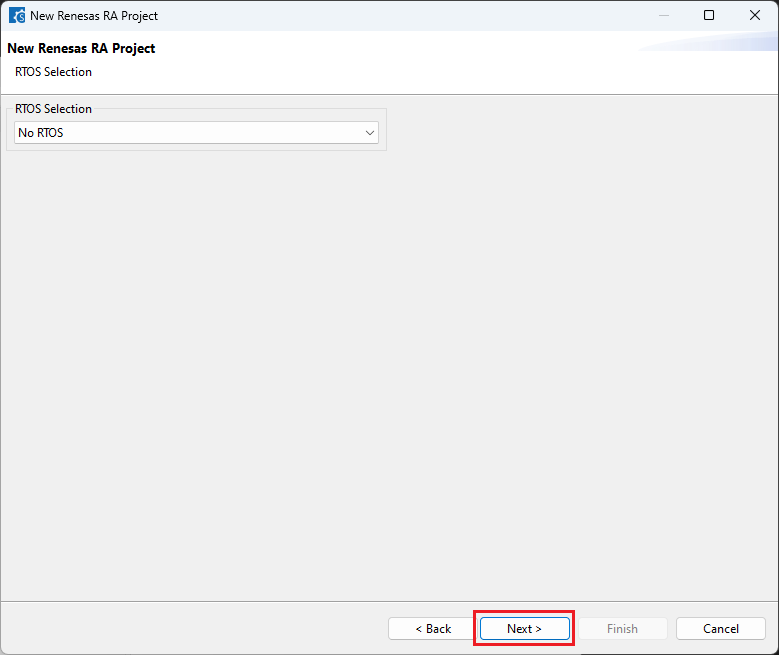
Choose the “RTOS” configuration and continue by clicking [Next] (Continue with “No RTOS” for the sample project).
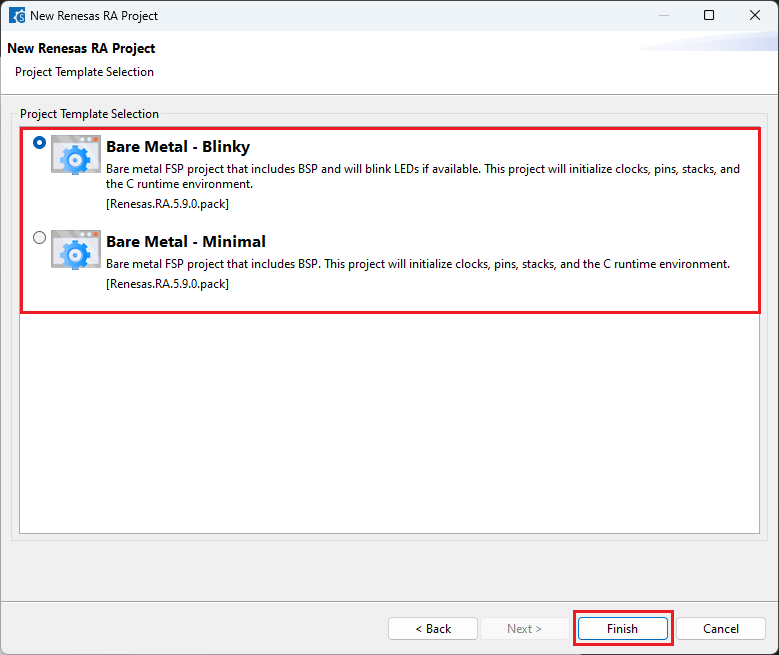
Choose one of the project templates then click [Finish] to complete the project creation steps.
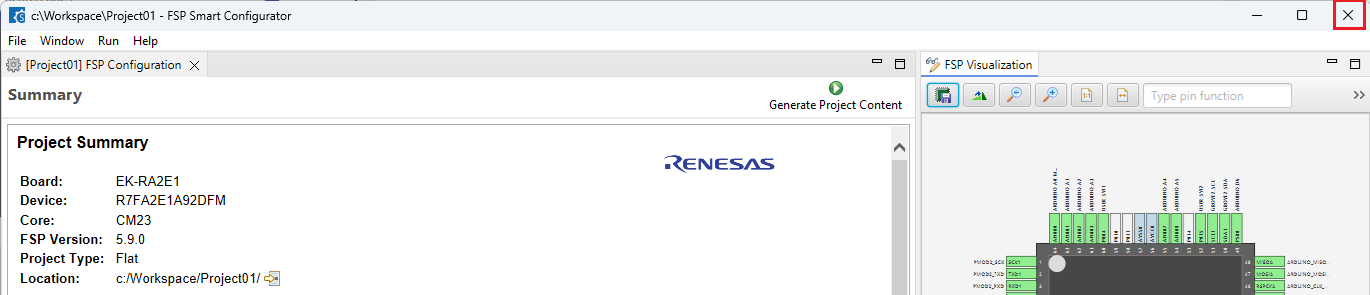
Close [RA Smart Configurator] after generation of the project files completed.
8.4. Building the Project
For building a project, which has been created with RA Smart Configurator, please follow the steps below:
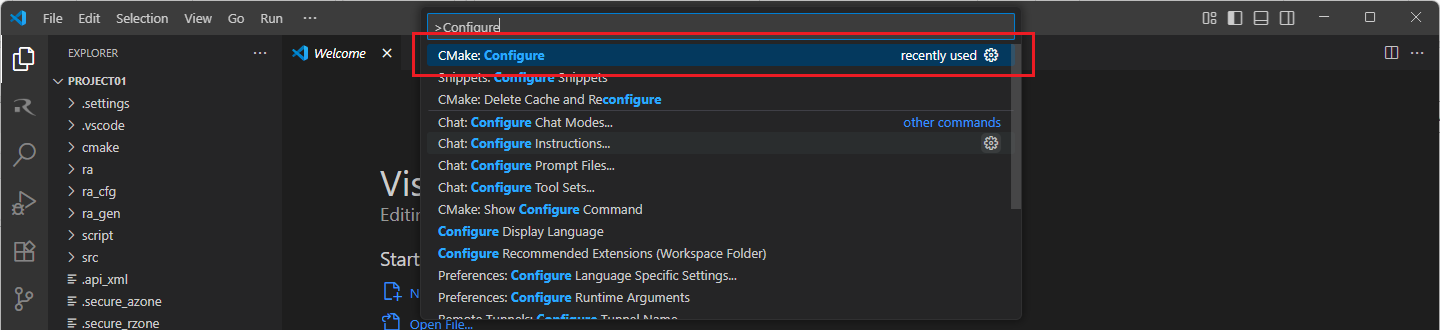
When the project is opened for the first time, CMake configure and the CMake Kit selection operations must be performed. In order to do these operations, open the “Command Palette” in VSCode and select “CMake: Configure” from the commands.
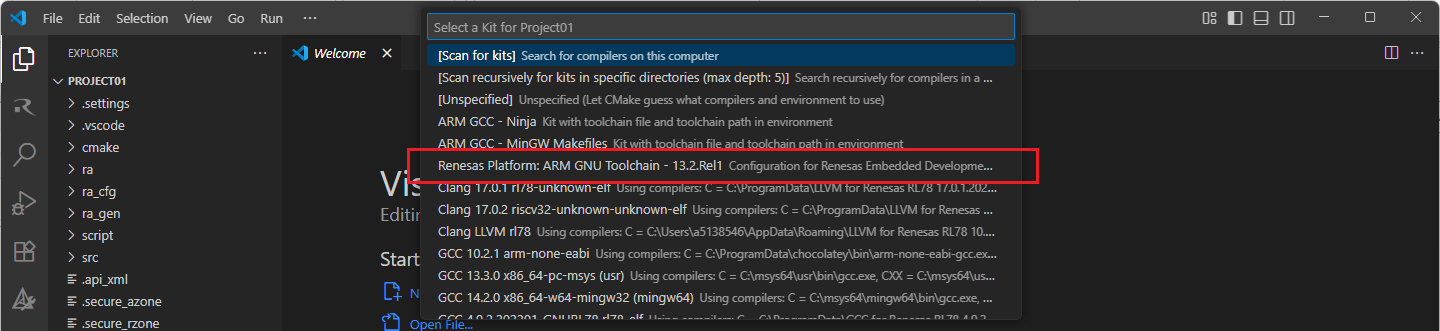
Then, a kit selection menu will be shown. Select “Renesas Platform: Arm GNU Toolchain …” from the menu if the project is generated for GCC toolchain, or, select “Renesas Platform: Arm LLVM Toolchain …” from the menu if the project is generated for LLVM toolchain. It is important to use the “Renesas Platform: …” kits since they contain Renesas-specific configuration parameters for Renesas projects.
Note
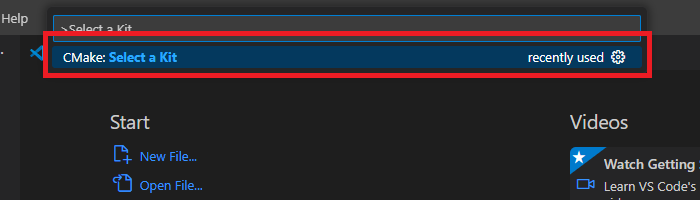
Missing the selection of the CMake Kit or wrong selection can cause build problems. If you missed the CMake Kit selection or selected a wrong kit, you can re-select the CMake Kit by running “CMake: Select a kit” command from the VSCode Command Palette.
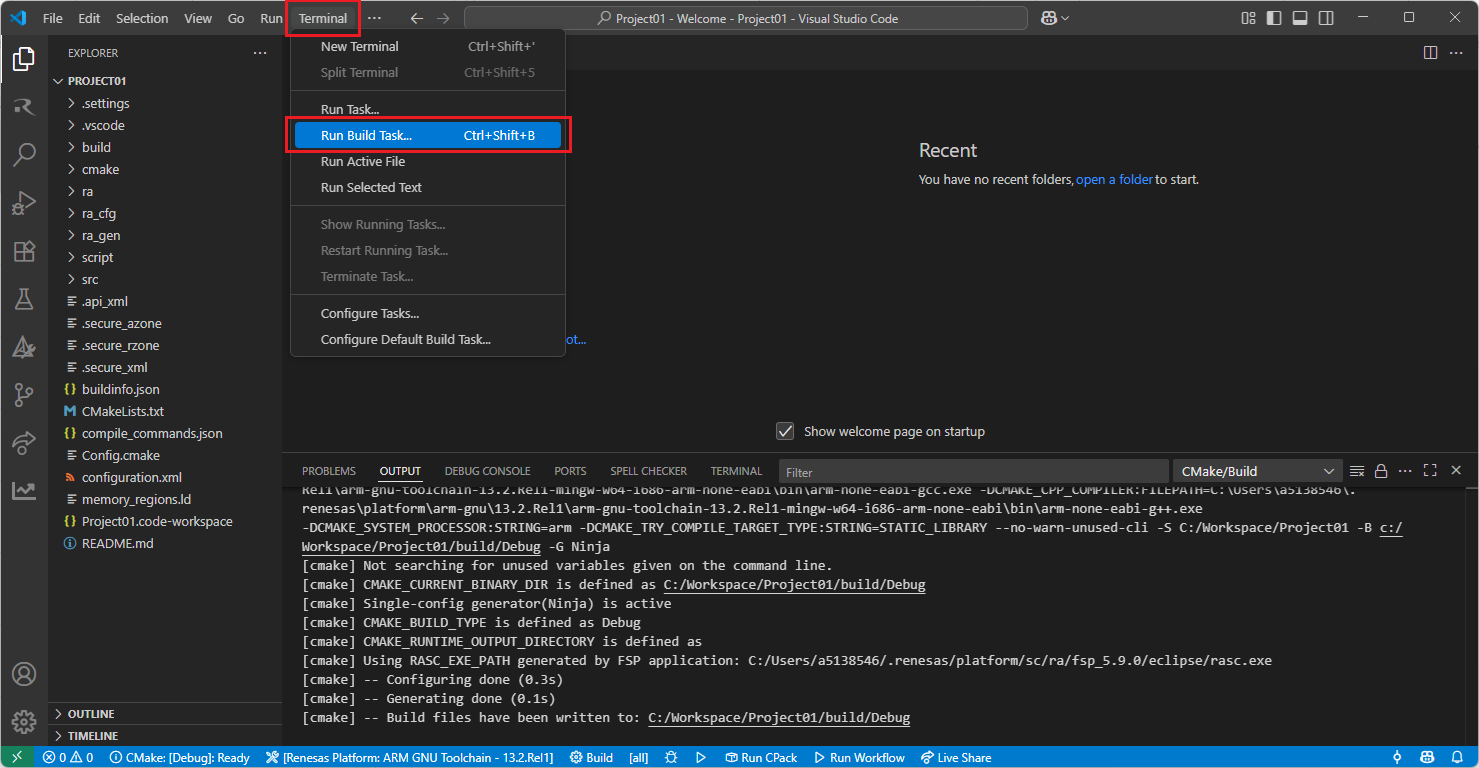
Now, go to and click “Terminal” => “Run Build Task” from the menu.
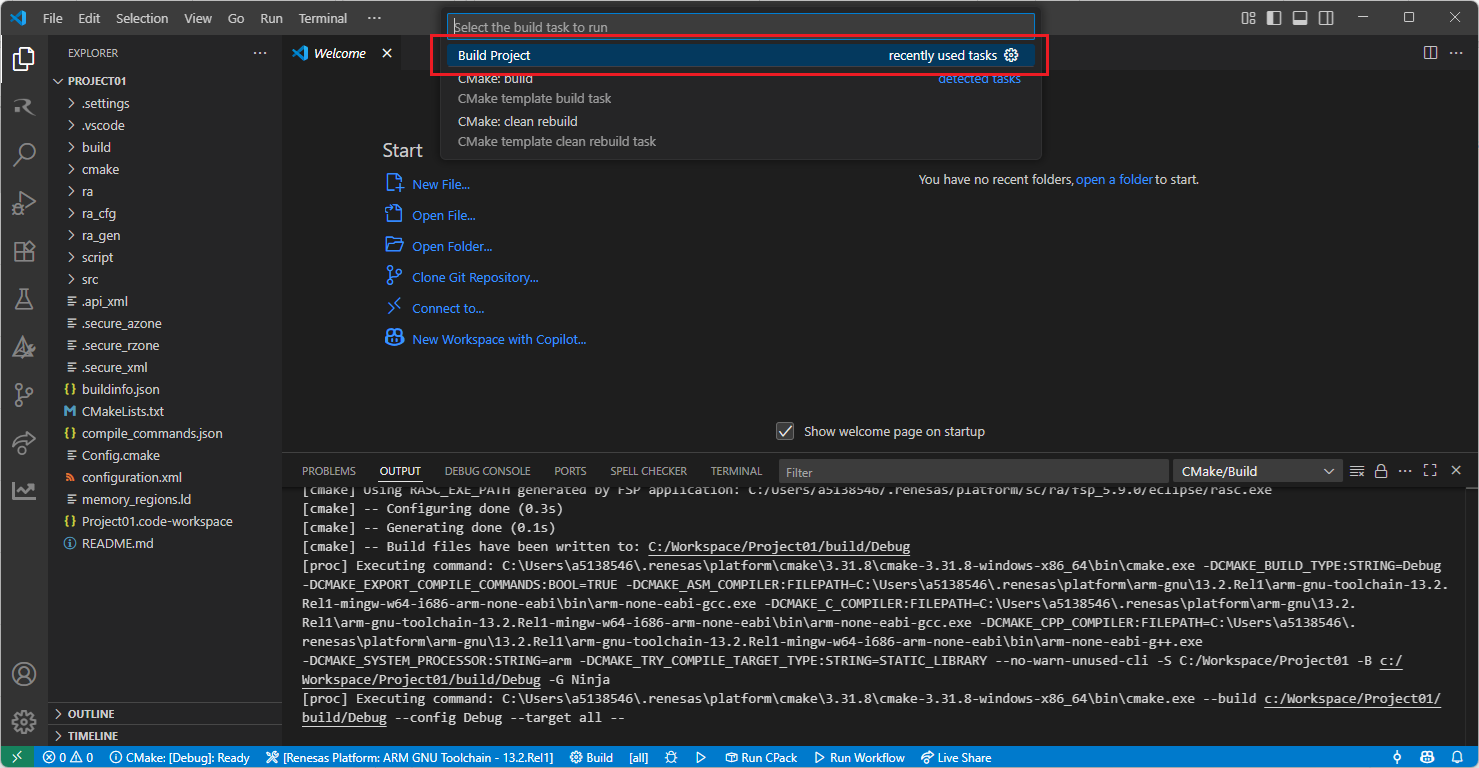
Build options will be shown, select the “Build Project” option.
Note
Alternatively, you can directly use the “Build” button to start the build operation via the VS Code toolbar.

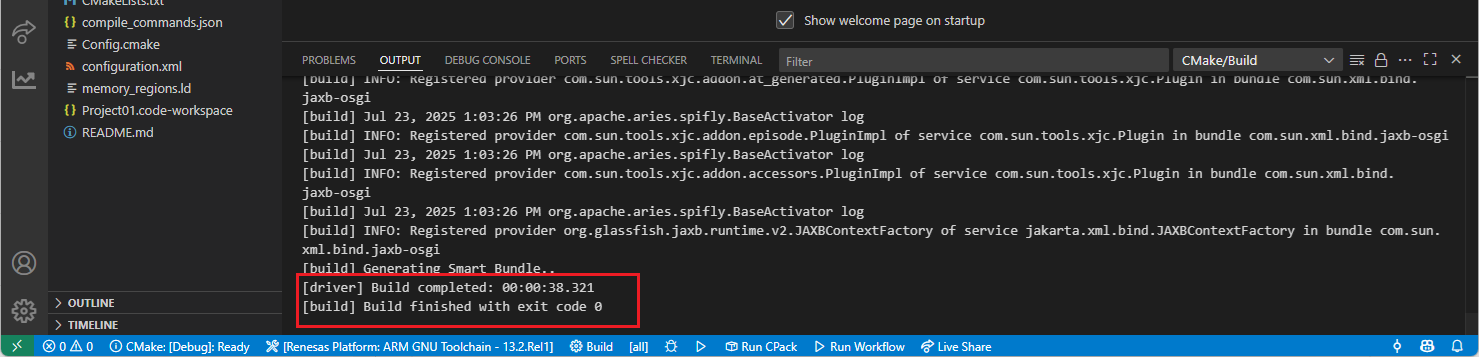
After the build operation, you will see the progress completed successfully. By default, build output (<project name>.elf) can be found in “build/<Build Type>/CMakeFiles/<project name>.elf.dir/” folder.
8.5. Editing/Re-configuring the Project
To edit a project, which has been created with RA Smart Configurator, please follow the steps below:
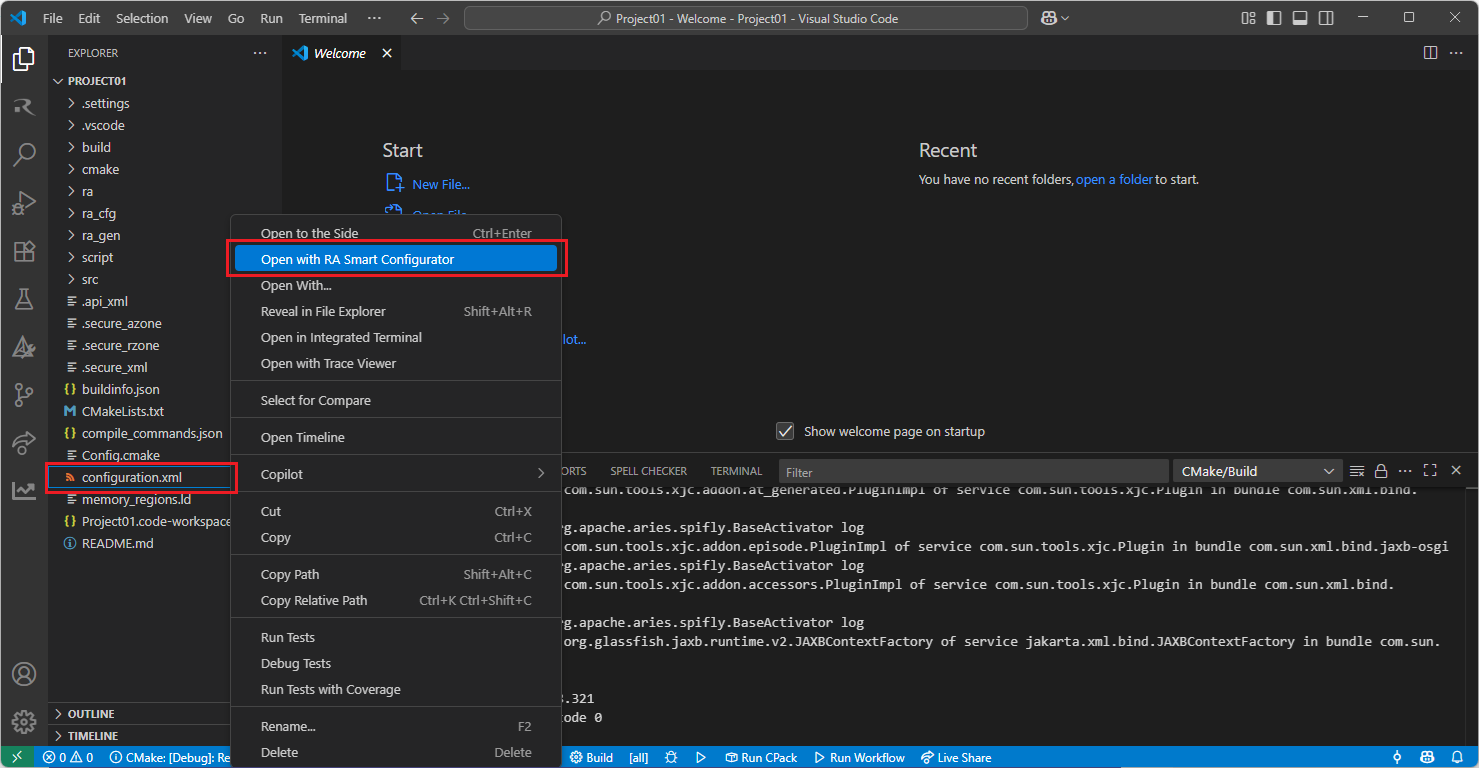
Right click the “configuration.xml” file at the project root, and select the “Open with RA Smart Configurator” option in the context menu.
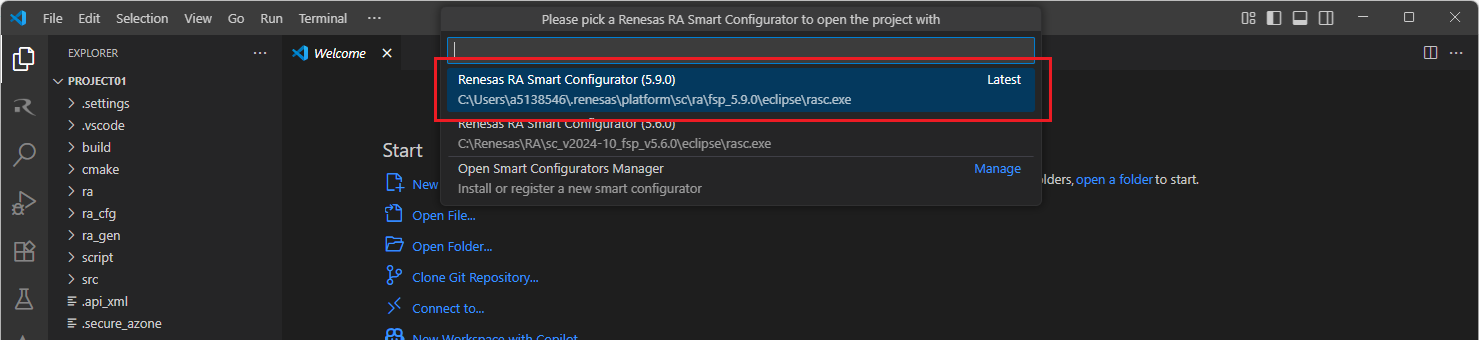
VSCode will show installed [RA Smart Configurator] list, select a [Smart Configurator] from the list to open the project.
VSCode will open the project in the selected RA Smart Configurator, now you can edit your project configuration in the RA Smart Configurator. Once the changes completed, click the “Generate Project Content” button to re-generate the project content.

TIP: For more information about RA Smart Configurator, click here to visit RA Smart Configurator page.
8.6. Debugging the Project
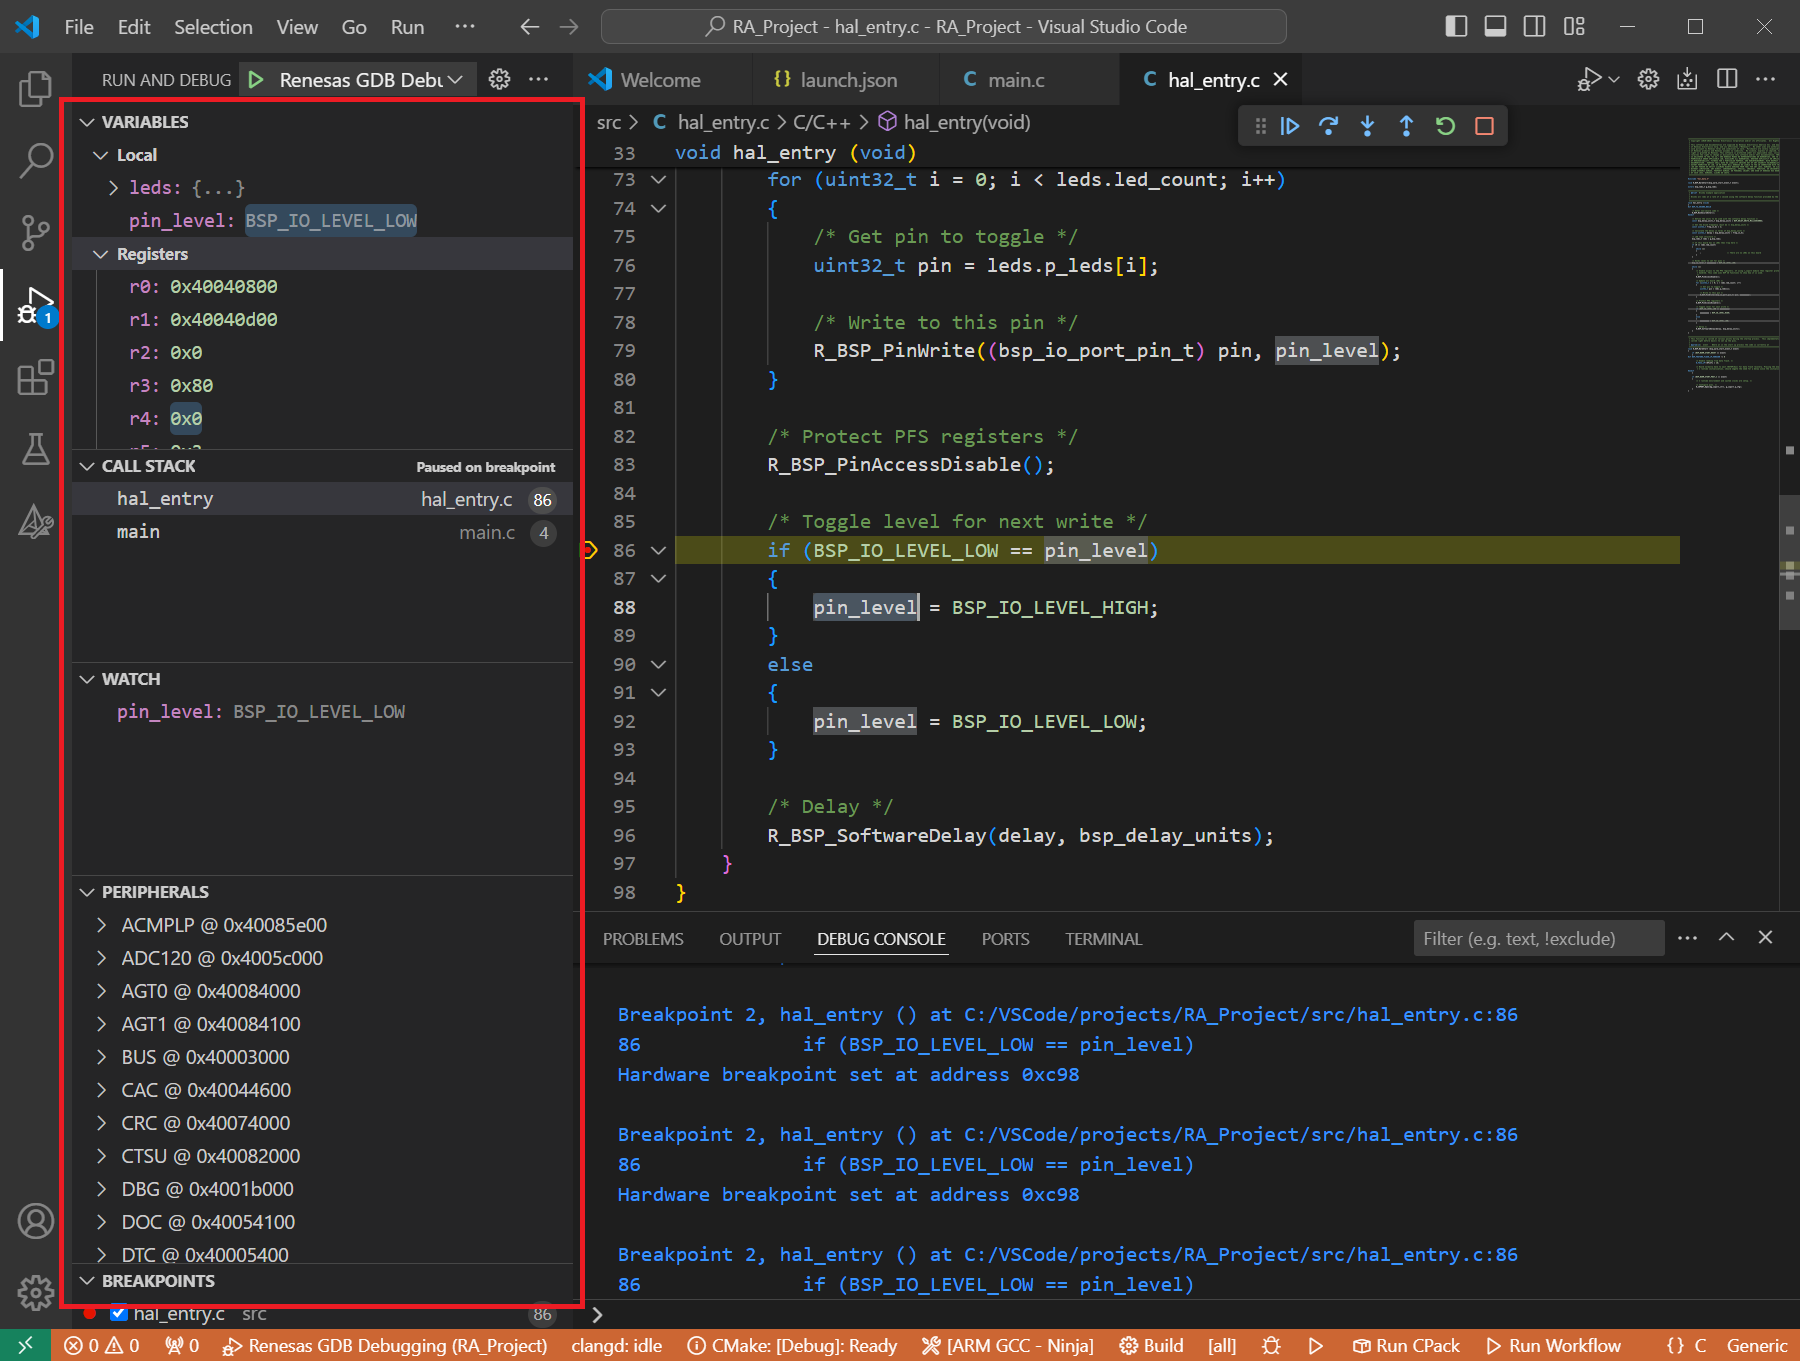
A debug session can be started by selecting the created configuration and clicking the [Start Debugging] button in the [Run and Debug] tab, or pressing [F5] from the keyboard.
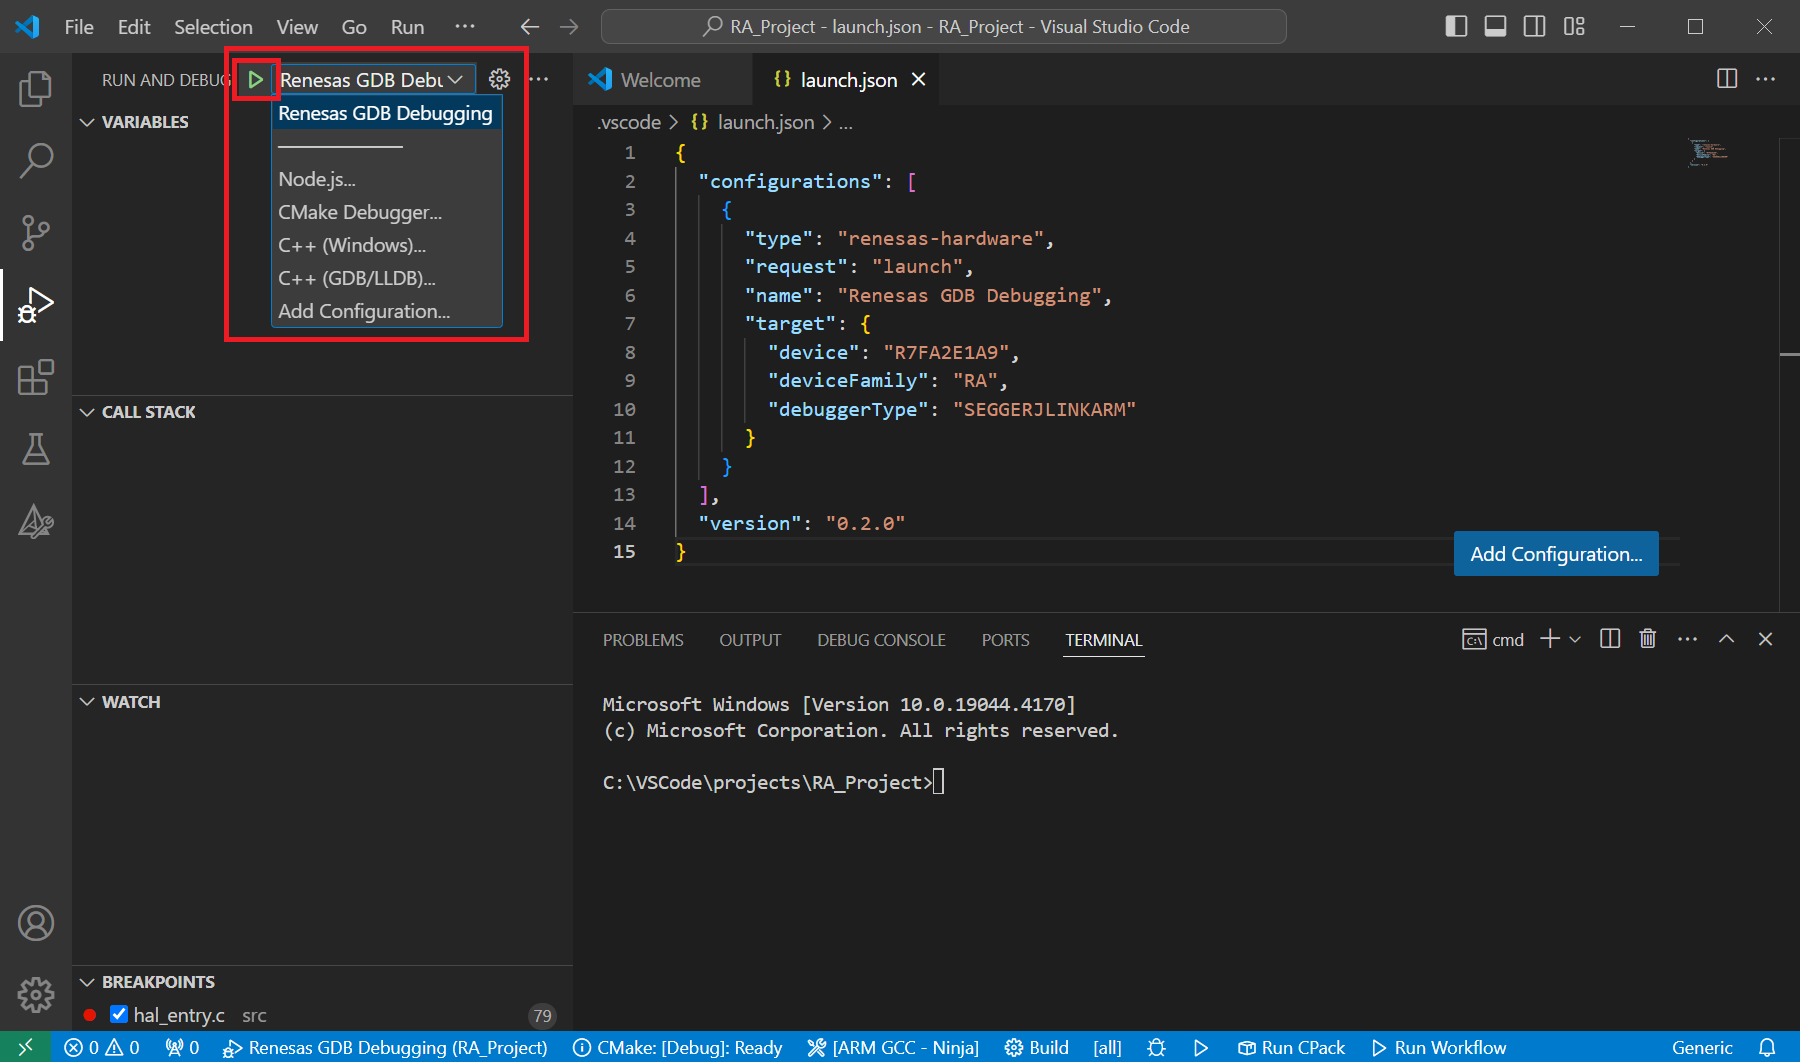
When VS Code starts the debug session, common debug control flow functions like resume, suspend, step into, step over, step out, restart, terminate debug session can be performed via the debug flow control buttons. Also, the [Debug Console] view will contain useful messages during the debug session.

During the debug session, details about the local variables, device registers, call stack, watched variables, states of the peripherals can be accessed at the primary sidebar of VS Code in the [Run and Debug] tab.