14. Quick Start for Renesas RZ
14.1. Supported Environments
Operating System |
Windows: Windows 10 / Windows 11 Linux: Ubuntu 22.04 / Ubuntu 24.04 |
VS Code version |
1.102.0 (minimum) |
VS Code can be downloaded and installed from this page https://code.visualstudio.com/.
14.2. Installation
Please choose your operating system for operating system dependent installation steps.
For the Renesas RZ Family, Renesas Platform provides a straightforward installation wizard to install the CMake, Ninja, Python, SEGGER J-Link and the Support Files for RZ Family. To set up your environment:
Open VS Code.
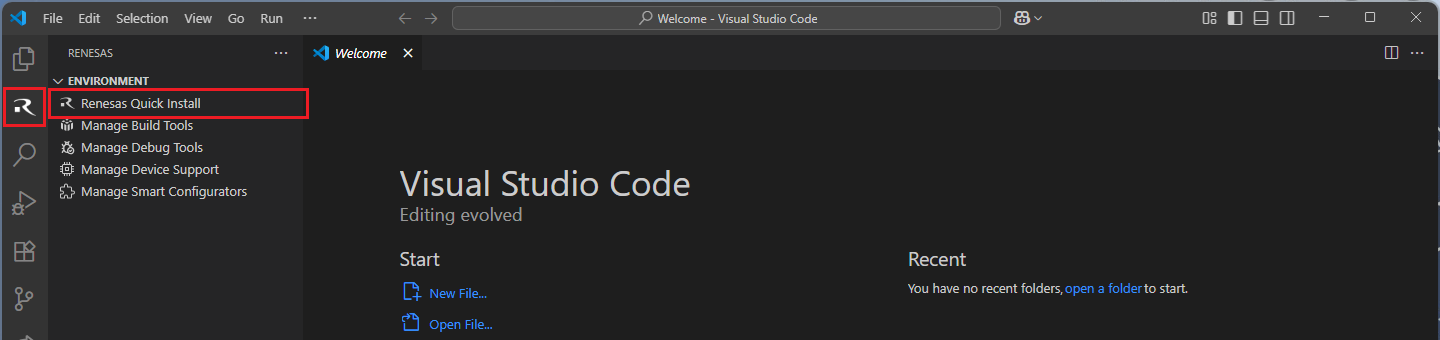
Navigate to the “Renesas” tab in VS Code. Then, click “Renesas Quick Install” in the “Environment” view.
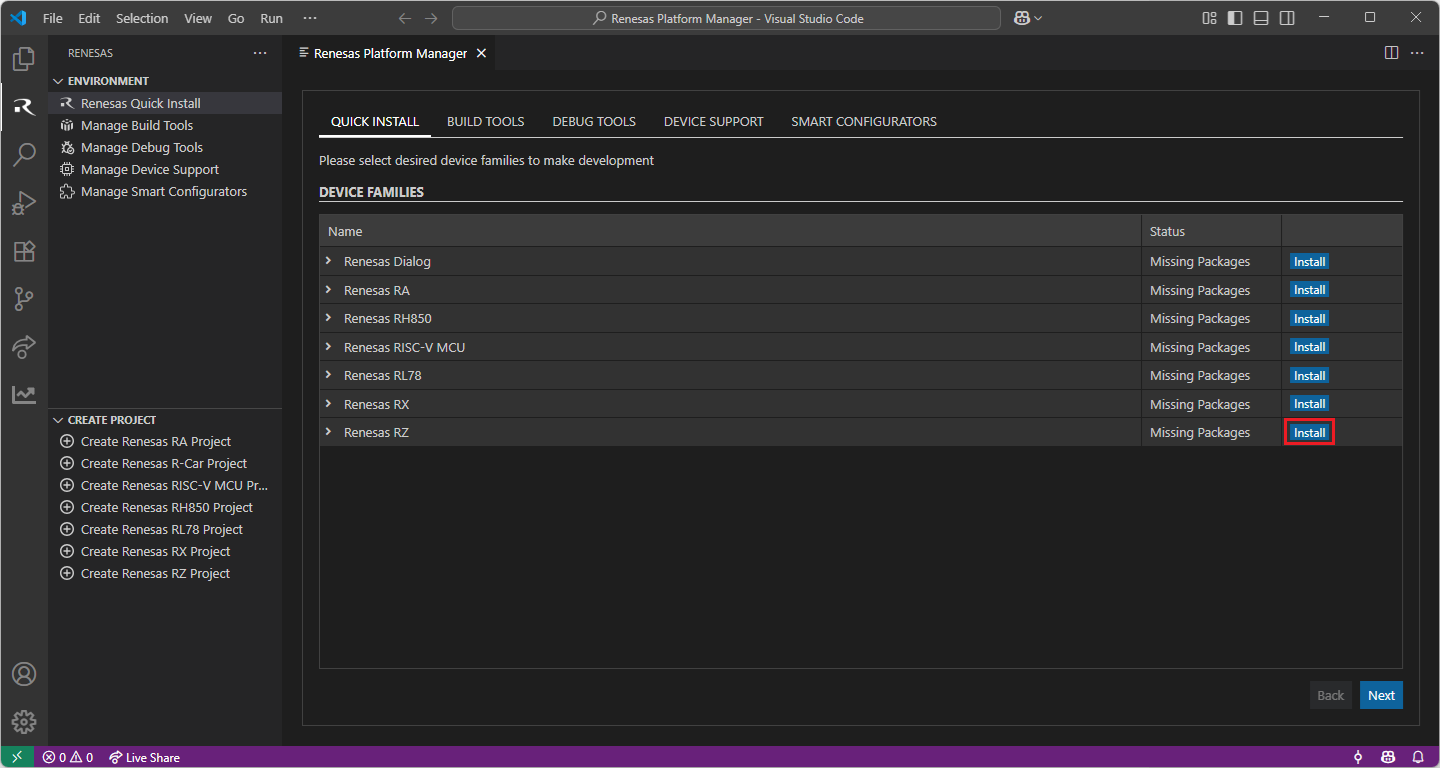
Click the “Install” button for the “Renesas RZ” device family. The Renesas Platform will now check the dependencies required by the Renesas RZ Device Family. The Renesas Platform extension will check the local environment and CMake, Ninja, Python, SEGGER J-Link and the Support Files for RZ Family, then create an installation plan for them if necessary.
When your selection is ready, click the “Start Installations” button. The download and installation process will start automatically.

Installing the “Arm GNU Toolchain” toolchains for RZ Development
For installing “Arm GNU Toolchain”:
Download and install the latest toolchain:
https://developer.arm.com/downloads/-/arm-gnu-toolchain-downloads
For the Renesas RZ Family, Renesas Platform provides a straightforward installation wizard to install the CMake, Ninja, Python, SEGGER J-Link and the Support Files for RZ Family. To set up your environment:
Open VS Code.
Navigate to the “Renesas” tab in VS Code. Then, click “Renesas Quick Install” in the “Environment” view.
Click the “Install” button for the “Renesas RZ” device family. The Renesas Platform will now check the dependencies required by the Renesas RZ Device Family. The Renesas Platform extension will check the local environment and CMake, Ninja, Python, SEGGER J-Link and the Support Files for RZ Family, then create an installation plan for them if necessary.
When your selection is ready, click the “Start Installations” button. The download and installation process will start automatically.
Most of the installations will be performed automatically, some installations may require manual interaction.
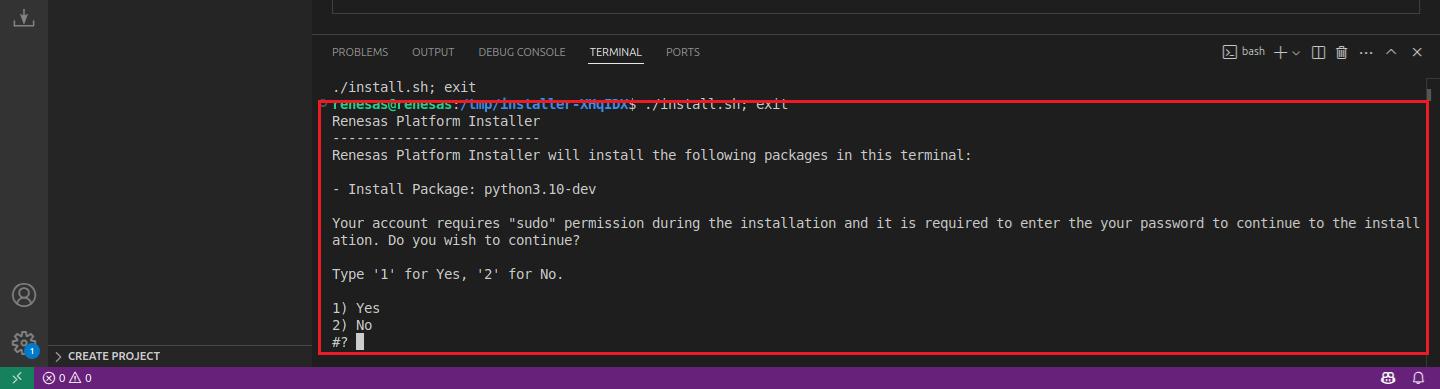
During the “Python 3.10” installation, the terminal wizard will appear for manual interaction. The terminal will show the execution plan and ask for confirmation before continuing. During the installation, it requires administrative rights to execute the installation, thus a password could be needed during the installation. Please make sure that the current user has “sudo” permissions and enter the password.
Installing the “Arm GNU Toolchain” toolchains for RZ Development
For installing “Arm GNU Toolchain”:
Download and install the latest toolchain:
https://developer.arm.com/downloads/-/arm-gnu-toolchain-downloads
For the Renesas RZ Family, Renesas Platform provides a straightforward installation wizard to install the CMake, Ninja, Python, SEGGER J-Link and the Support Files for RZ Family. To set up your environment:
Open VS Code.
Navigate to the “Renesas” tab in VS Code. Then, click “Renesas Quick Install” in the “Environment” view.
Click the “Install” button for the “Renesas RZ” device family. The Renesas Platform will now check the dependencies required by the Renesas RZ Device Family. The Renesas Platform extension will check the local environment and CMake, Ninja, Python, SEGGER J-Link and the Support Files for RZ Family, then create an installation plan for them if necessary.
When your selection is ready, click the “Start Installations” button. The download and installation process will start automatically.
Most of the installations will be performed automatically, some installations may require manual interaction.
During the “Python 3.10” installation, the terminal wizard will appear for manual interaction. The terminal will show the execution plan and ask for confirmation before continuing. During the installation, it requires administrative rights to execute the installation, thus a password could be needed during the installation. Please make sure that the current user has “sudo” permissions and enter the password.
Installing the “Arm GNU Toolchain” toolchains for RZ Development
For installing “Arm GNU Toolchain”:
Download and install the latest toolchain:
https://developer.arm.com/downloads/-/arm-gnu-toolchain-downloads
14.3. Opening a Project
RZ projects which are non-FSP RZ projects created in e 2 studio, can be opened in VS Code by simply opening the project folder, and then developers can use the predefined CMake Build Scripts for RZ provided by the Renesas Build Utilities to build the project.
14.3.1. Opening the project in VSCode
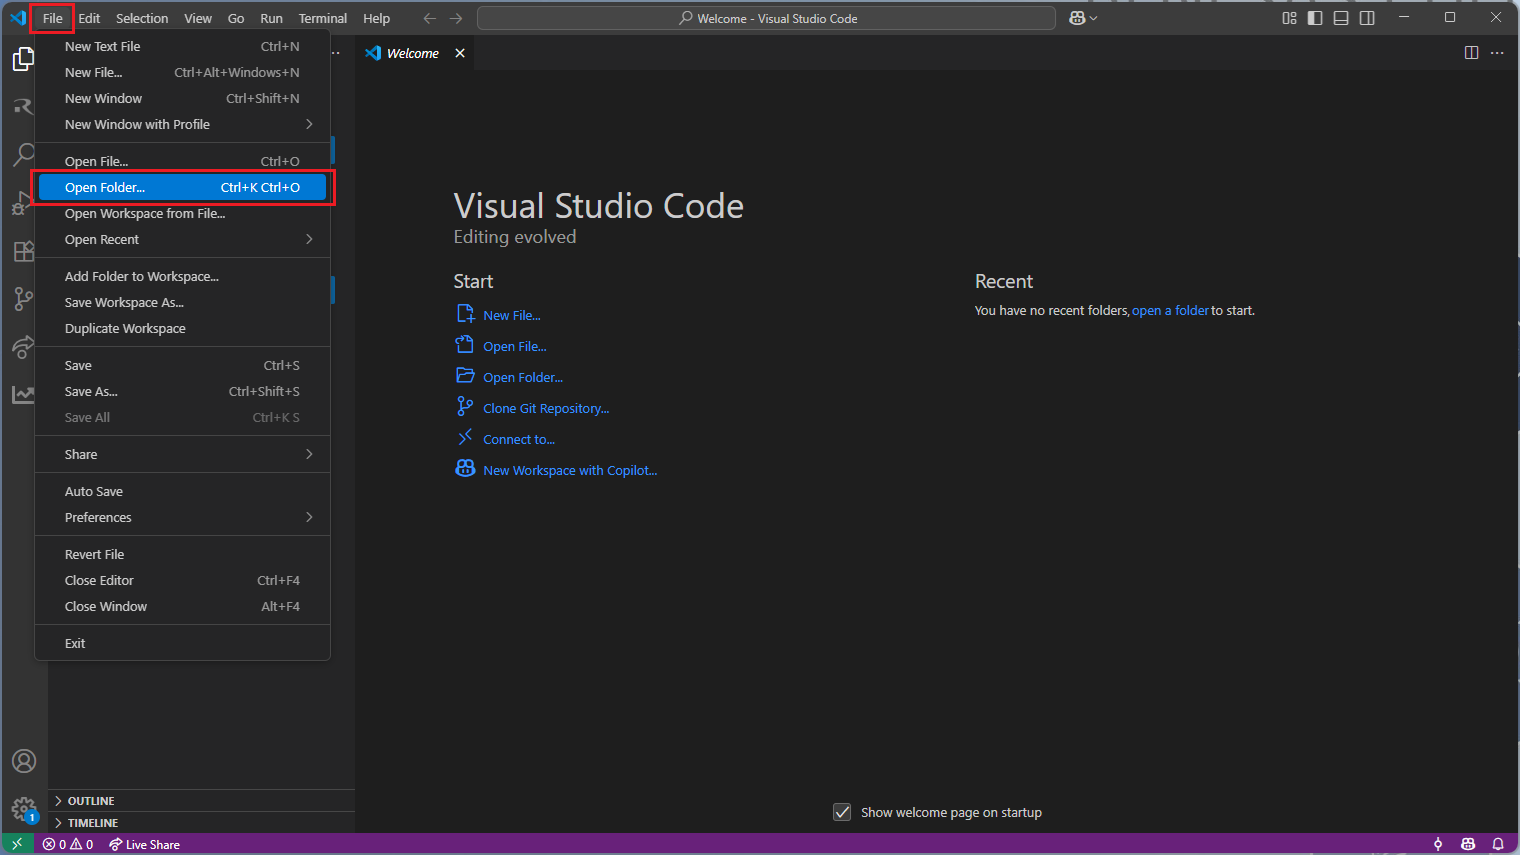
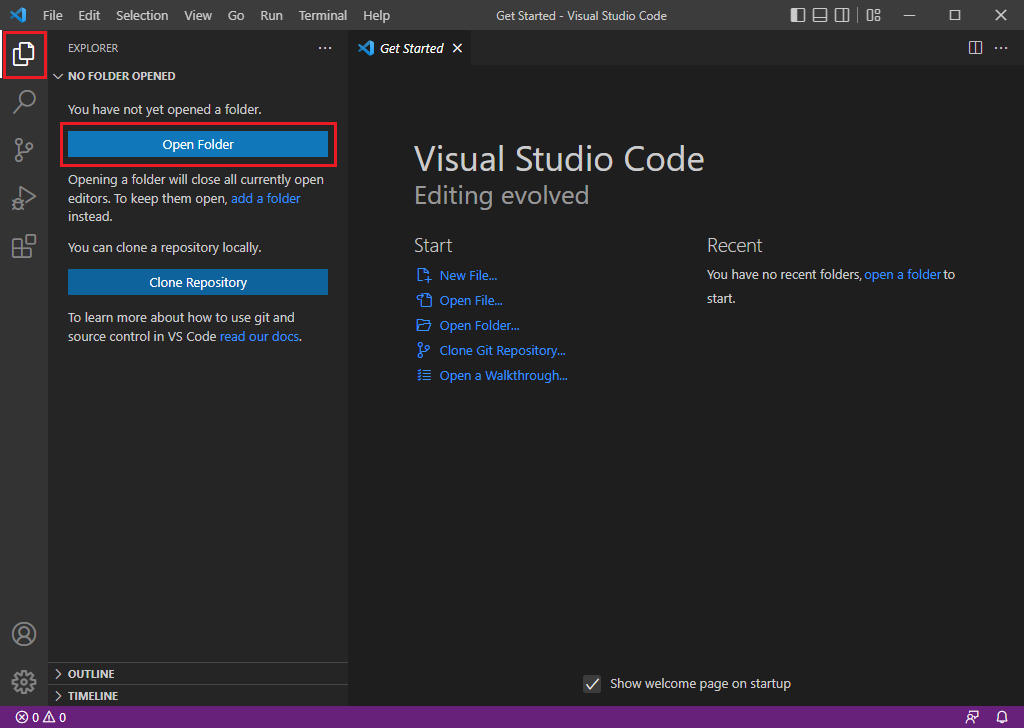
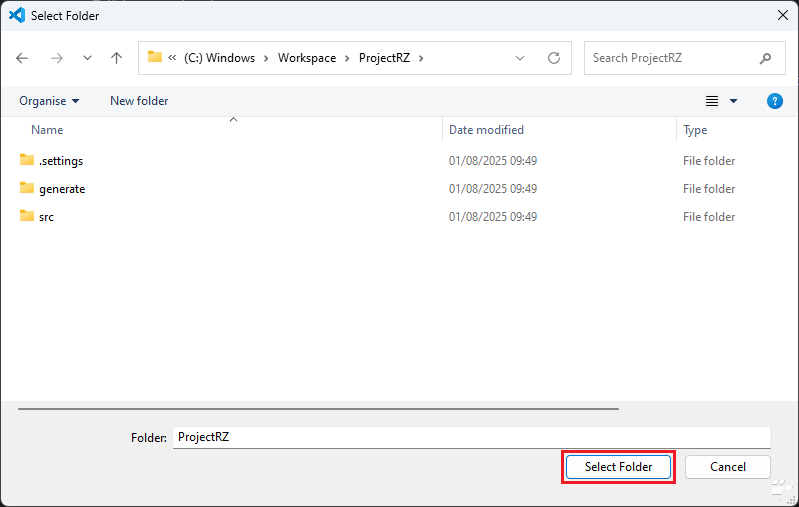
In [Explorer] view, select [Open Folder] button if available. If not, select [File] → [Open Folder…] menu item.
In [Open Folder] dialog, browse to project folder and click [Select Folder] button.
Besides, there are alternative methods to open a project in VS Code, you can check the alternative methods in “Productivity Tips” section Alternative ways for opening a project in VSCode
14.3.2. Creating CMake Toolchain Scripts and Building the Project
Note
RZ Smart Configurators generate CMake project files during project creation. Please follow the guide below for projects that were not generated using an RZ Smart Configurator.
The Renesas Build Utilities extension provides predefined scripts to build existing Renesas C/C++ projects generated in e² Studio. Please follow the instructions below to create and configure CMake project files for the RZ device family.
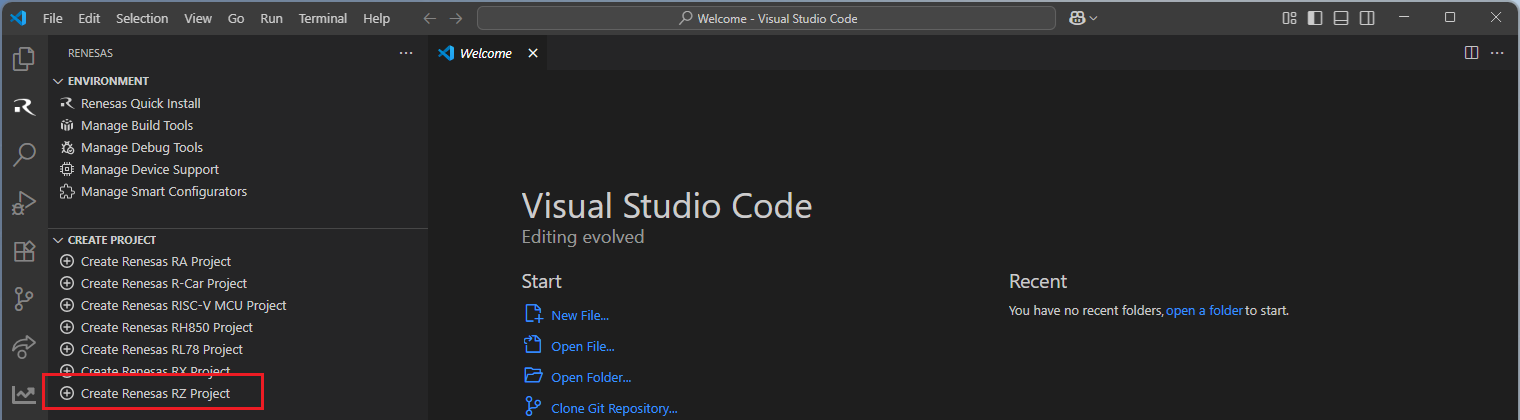
Navigate to “Renesas” and click [Create Renesas RZ project] from the commands.
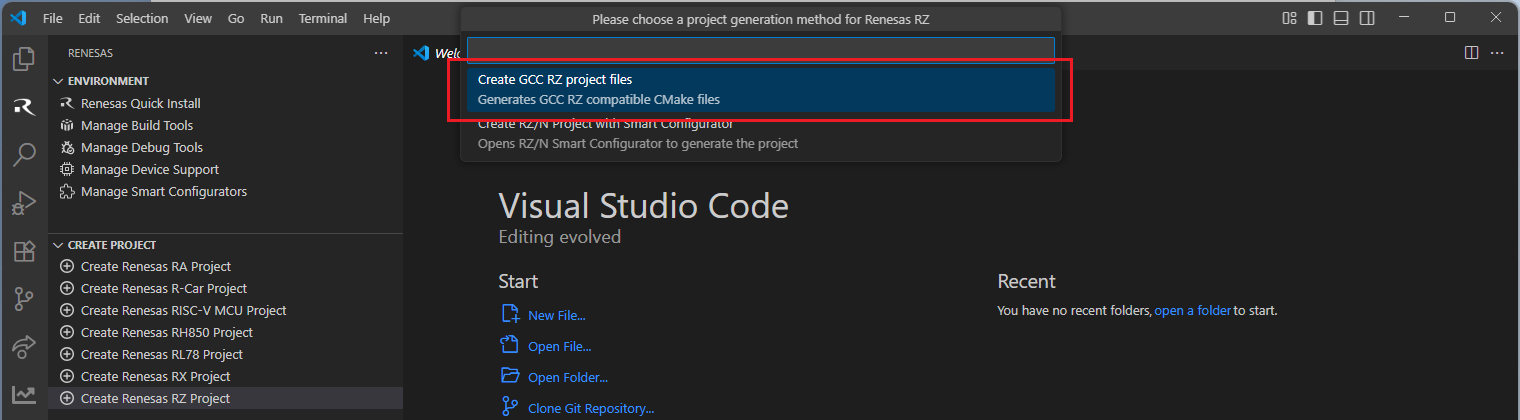
Select [Create GCC RZ Project Files] option from the list.
Select the desired project folder where the CMake project files will be created.
The commands will generate the VS Code settings files, as well as the CMake script files cross.cmake and CMakeLists.txt files:
.vscode/settings.json - this file contains the settings for CMake.
.vscode/tasks.json - this file contains the build definitions for VSCode.
Cross.cmake - this file contains the information about the toolchain to use.
CMakeLists.txt - this file contains the information about the building project (which files to build, which options to set etc.).
After generating these files, it is necessary to configure the toolchain information and device specific build settings in these files. The typical approach can be structured into the following steps:
Open the cross.cmake file, and configure the toolchain path.
Get the device specific build settings from e2 Studio by following the instructions below:
2.1. Open the desired project in e2 studio.
2.2. Go to [Project] => [Properties] menu.
2.3. In the project properties windows, navigate to [C/C++ Build] => [Settings] section.
2.4. In the “Tool Settings” tab, check the “Common”, “Compiler”, “Assembler”, “Linker” sections. Depending on the target device get the values of the device specific parameters. The following parameters are the most common device specific parameters:
-isa
-cpu
-fpu (generally either -fpu or -nofpu)
-rom
-start
2.5. Now, open the project in VSCode, navigate to CMakeLists.txt and configure the device specific parameters in the CMake script.
Once all the necessary files are in place, open the [Command Palette] and run the [CMake: Delete Cache and Reconfigure] operation.
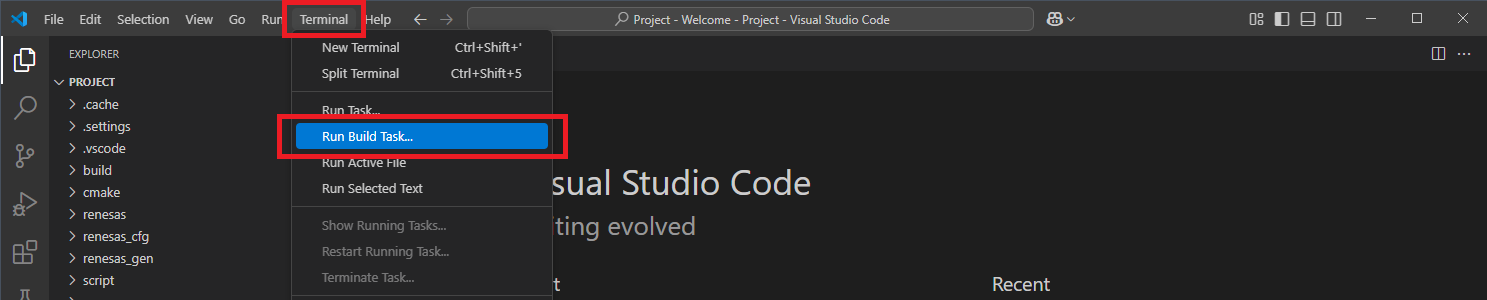
To run build task, either press [CTRL+SHIFT+B] ([CMD+SHIFT+B] for macOS) or select [Terminal] → [Run Build Task…] from the menu.
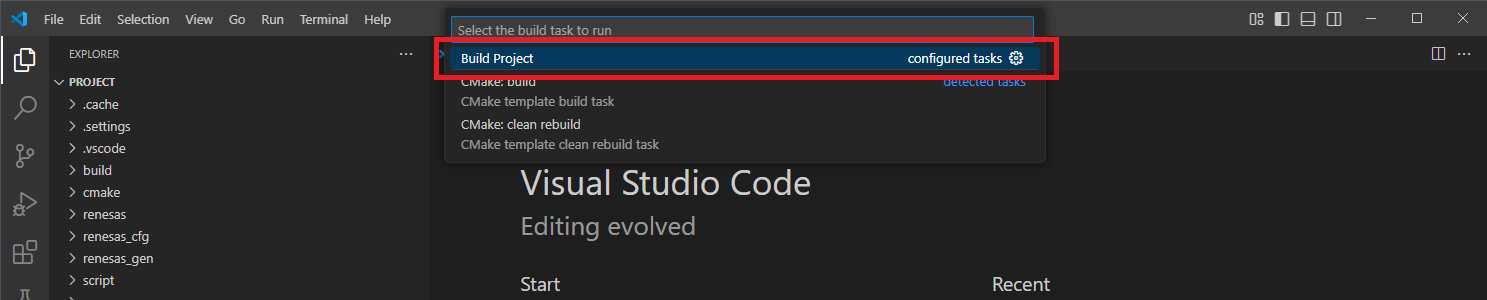
Build options will be shown, select the [Build Project] option.
Note
For more details on how to configure CMake build script parameters, please refer to the sample scenario:
14.4. Building the Project
Open the [Command Palette] in VSCode and click [CMake: Delete Cache and Reconfigure].
In the first time of running, a kit selection is shown. Select “[Unspecified]”.

Note
Missing the selection of the CMake Kit or wrong selection can cause build problems. If you missed the CMake Kit selection or selected a wrong kit, you can re-select the CMake Kit by running “CMake: Select a kit” command from the VSCode Command Palette.

Go to and click [Terminal] => [Run Build Task] from the menu.
Build options will be shown, select the [Build Project] option.
14.5. Debugging the Project
For debugging, you should create a debug launch configuration if it is not created already.
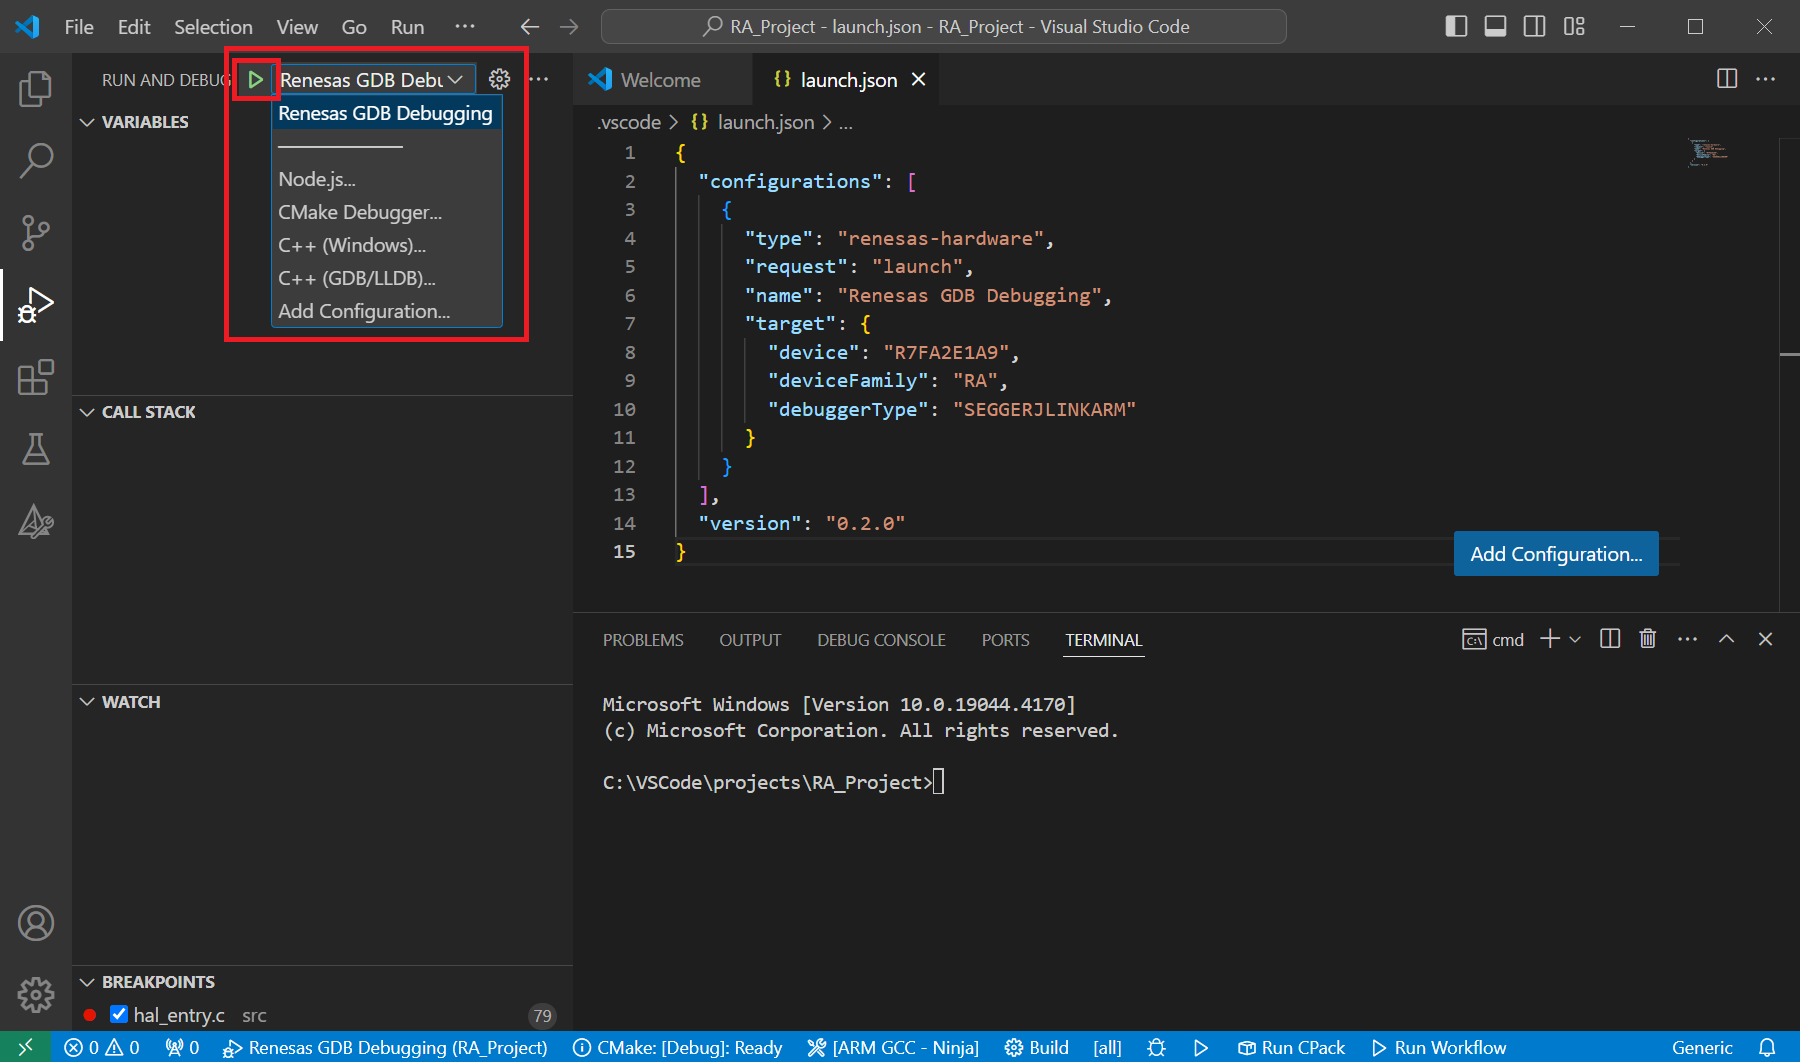
Go to the [Debug] tab in VSCode and generate a launch configuration for [Renesas GDB Hardware Debugging]. This will generate a sample Launch configuration in the .vscode/launch.json file.
Open the Launch configuration and set the correct parameters for your target device. For example:
 1{
 2  // Use IntelliSense to learn about possible attributes.
 3  // Hover to view descriptions of existing attributes.
 4  // For more information, visit: https://go.microsoft.com/fwlink/?linkid=830387
 5  "version": "0.2.0",
 6  "configurations": [
 7    {
 8      "type": "renesas-hardware",
 9      "request": "launch",
10      "name": "Renesas GDB Hardware Debugging",
11      "target": {
12        "deviceFamily": "RZ",
13        "device": "R7S910001",
14        "debuggerType": "SEGGERJLINKARM"
15      }
16    }
17  ]
18}
A debug session can be started by selecting the created configuration and clicking the [Start Debugging] button in the [Run and Debug] tab, or pressing [F5] from the keyboard.
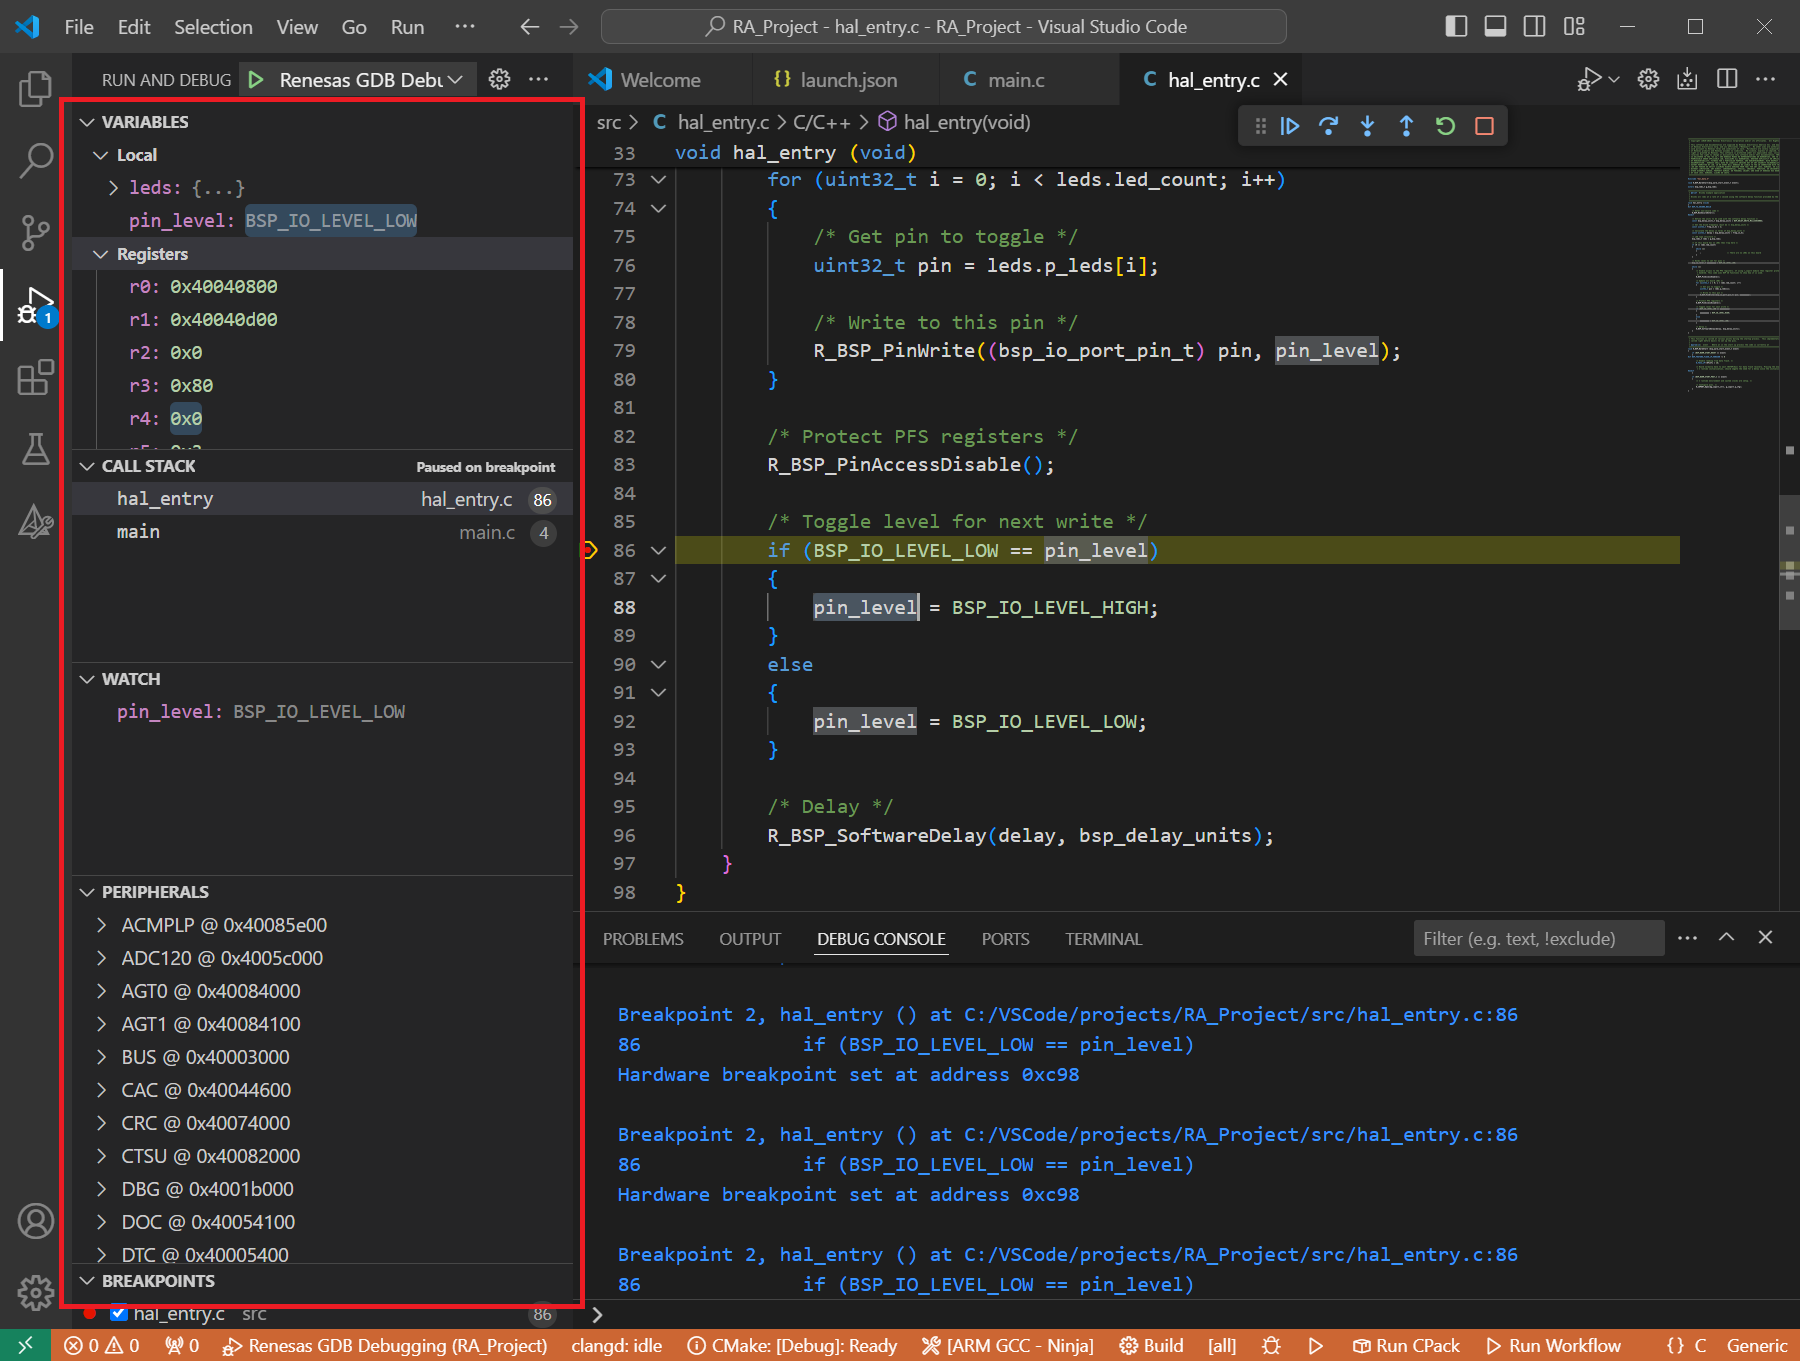
When VS Code starts the debug session, common debug control flow functions like resume, suspend, step into, step over, step out, restart, terminate debug session can be performed via the debug flow control buttons. Also, the [Debug Console] view will contain useful messages during the debug session.

During the debug session, details about the local variables, device registers, call stack, watched variables, states of the peripherals can be accessed at the primary sidebar of VS Code in the [Run and Debug] tab.